Introduction to supctl
The purpose of this tutorial to guide you through the use of the Avassa command line supctl.
We assume that you have run through the
Deploy more advanced applications
and kept the applications and deployment specifications so that you can start
from there.
Installing
See the how-to instruction on how to install the supctl command line tool.
Getting started
The easiest way to get started is to use tab completion and get an understanding of the top level entities
supctl show <TAB>
application-deployments  policy                     -c
application-status       strongbox                  -h
applications             image-registry             -s
assigned-sites           tenant-resource-profiles   --config
dns                      tenants                    --help
image-registry           volga                      --site
These top level entities are:
application-deployments: Specifies how an application is deployed and upgraded in the system.application-status: This shows a summary of the applications health status on each deployed site.applications: The application specification; an application has a set of services. A service has a set of containers. An application is deployed to a set of sites through anapplication-deployment.assigned-sites: The set of assigned sites to which you (as a tenant) can deploy applicationsdns:image-registry: Working with external and the built-in image registries.policy: Manage authorization policies; polices are used to authorize requests and to give system wide capabilities to tenants.tenant-resource-profiles: Profiles used to restrict resource allocation on hosts for tenants.strongbox: Functions for secrets management.system: System wide settings like resource profiles applicable to all sites.tenants: All users belong to a tenant. A tenant is either a site provider or an application owner. Site providers can create sites and control hardware resources etc. Application owners can create and manage applications and their deployments.volga: Volga is the built-in event bus. You can publish and subscribe to topics.
Two very useful options are shown above
-c--config: show commands will display both state and configuration data. If you just want configuration, use this option. This is useful for example to get payloads for editing.-s--site: proxy the command to a specific site. Without this option you will "only" see information known by the Control Tower. More on that later.
In order to learn all the details about the entities above use the REST API browser. It shows all fields, descriptions and sample payload.
The top level commands and options are (truncated output):
supctl -h
...
positional arguments:
  {do,create,edit,replace,merge,patch,delete,list,count,show,completion,profile,update}
    do                  invoke an operation
    create              create configuration
    edit                edit configuration
    replace             replace configuration
    merge               merge configuration
    patch               patch configuration
    delete              delete configuration
    list                retrieve the keys of a list (and nothing else)
    count               retrieve the number of elements in a list
    show                show configuration or state
    completion          output sourceable bash/zsh completion script
    profile             manage profiles
    update              update the supctl client
...
options:
  -v, --verbose         verbose output
...
  -j, --json            get or send JSON
  -y, --yaml            get or send YAML
...
As you see you have verbs to modify configuration in the system. The do verb is used in order to invoke an operation on an entity. supctl gives you tab completion by using a cached schema. If the Avassa system is updated new data and commands might become available. supctl will normally detect this and update itself silently, but you can force an update using the update command.
The -v option is useful to see the complete payload in order to perform REST API calls for the same command. You can choose json or yaml output formats when showing state and configuration.
With this as a background let us start run a couple of commands. We will walk through the simple popcorn application.
Inspecting sites
Before showing configuration and state for sites, let us first briefly mention the tenant model. A site provider tenant owns and manages the sites and the hosts on the site. Then, as a site provider you can assign sites to application owner tenants. These tenants will only see the sites they are assigned to.
Assume you are a site provider and want to work with your sites, they can be shown by the following command. As you see you get full details on each site and the hosts.
supctl show system sites
- name: stockholm-sture
  descriptive-name: Sture
  type: edge
  location:
    latitude: 59.33898823699348
    longitude: 18.06780218371588
  creation-time: 2022-04-20T14:21:40.405Z
  domain: stockholm-sture.20-apr.b2.avassa.net
  labels:
    system/type: edge
    system/name: stockholm-sture
  blocked: false
  topology:
    parent-site: control-tower
  parent-cluster-address:
    ip:
      - 10.20.10.1
  ingress-allocation-method: disabled
  connection-state:
    connected: true
    last-connect: 2022-04-21T10:13:35.761Z
    last-disconnect: 2022-04-21T07:16:50.413Z
  call-home-state:
    all-hosts:
      called-home: 1
      total: 1
    controller-hosts:
      called-home: 1
      total: 1
    cluster-established: true
  hosts:
    - host-id: f65c9f46-79cf-43a4-957c-faba780f2a64
      controller: true
      cluster-hostname: stockholm-sture-001
      supd-version: 0-1c849f62
      last-call-home:
        time: 2022-04-21T07:17:05Z
        reason: startup
      smbios:
        board-asset-tag: i-0af90d05713b5968a
        board-vendor: Amazon EC2
        chassis-asset-tag: Amazon EC2
        chassis-type: "1"
        chassis-vendor: Amazon EC2
        product-name: t3.micro
        product-serial: ec2fead8-92fb-6fc9-6378-34ec7e7f4fac
        product-uuid: ec2fead8-92fb-6fc9-6378-34ec7e7f4fac
      platform:
        architecture: x86_64
        total-memory: 963176 KiB
        vcpus: 2
        operating-system: Amazon Linux 2
        kernel-version: 5.10.102-99.473.amzn2.x86_64
        docker:
          version: 20.10.7
          api-version: "1.41"
          os: linux
          arch: amd64
          git-commit: b0f5bc3
          components:
            - name: Engine
              version: 20.10.7
            - name: containerd
              version: 1.4.6
            - name: runc
              version: 1.0.0
            - name: docker-init
              version: 0.19.0
...
However as an application owner you can inspect your assigned sites:
supctl show assigned-sites
- name: stockholm-sture
  descriptive-name: Sture
  type: edge
  location:
    latitude: 59.33898823699348
    longitude: 18.06780218371588
  labels:
    system/type: edge
    system/name: stockholm-sture
  host-labels: {}
  volume-labels: {}
  network-interface-labels: {}
- name: stockholm-sergel
...
You can also dig down into site's host details at a specific site:
supctl show --site stockholm-sture system cluster hosts stockholm-sture-001
cluster-hostname: stockholm-sture-001
version: 0-b2e25d93
oper-status: up
hostname: ip-10-20-1-252
host-id: f65c9f46-79cf-43a4-957c-faba780f2a64
controller: true
labels:
  system/controller: "true"
local-volumes: []
host-network:
  ip-addresses:
    - 10.20.1.252
    - fe80::4d7:2dff:fe3b:851c
network-interfaces:
  - name: default
    os-interface-name: eth0
  - name: other
    os-interface-name: docker0
In some cases you probably want the show command to just show certain
fields, for this purpose you can use the --fields option. Note well
that you can also use tab completion after that option to see
available fields.
The following example
supctl show system sites --fields name,labels
Gives the following output:
- name: stockholm-sture
  labels:
    system/type: edge
    system/name: stockholm-sture
- name: stockholm-sergel
  labels:
    system/type: edge
    system/name: stockholm-sergel
- name: helsingborg-roda-kvarn
  labels:
    system/type: edge
    system/name: helsingborg-roda-kvarn
- name: gothenburg-bergakungen
  labels:
    system/type: edge
    system/name: gothenburg-bergakungen
- name: control-tower
  labels:
    system/type: top
    system/name: control-tower
You can also select subsection within the YAML file. Assume you would
like to see the platform information for each host within a site, that
appears as platform for each host whithin hosts:
...
hosts:
  - host-id: f65c9f46-79cf-43a4-957c-faba780f2a64
    controller: true
    cluster-hostname: stockholm-sture-001
...
platform:
      architecture: x86_64
      total-memory: 963176 KiB
      vcpus: 2
      operating-system: Am
That can be retrieved by saying that you want the fields
hosts/cluster-hostname and hosts/platform like below:
supctl show system sites stockholm-sture --fields "hosts/[cluster-hostname,platform]"
hosts:
  - cluster-hostname: stockholm-sture-001
    platform:
      architecture: x86_64
      total-memory: 963176 KiB
      vcpus: 2
      operating-system: Amazon Linux 2
      kernel-version: 5.10.102-99.473.amzn2.x86_64
      docker:
        version: 20.10.7
        api-version: "1.41"
        os: linux
        arch: amd64
        git-commit: b0f5bc3
        components:
          - name: Engine
            version: 20.10.7
          - name: containerd
            version: 1.4.6
          - name: runc
            version: 1.0.0
          - name: docker-init
            version: 0.19.0
You can also filter the selection based on a where expression, see examples below:
supctl show system sites --where="connection-state/connected='false'" --fields=name
- name: new-site
supctl show system sites --where="ingress-allocation-method='disabled'" --fields=name
- name: new-site
- name: metrograph
- name: electric-cinema
Inspecting applications
First, lets inspect the applications and deployment specifications:
supctl show applications
- name: popcorn-controller
  services:
    - name: popcorn-service
      mode: replicated
      replicas: 1
      share-pid-namespace: false
      containers:
        - name: kettle-popper-manager
          image: registry.gitlab.com/avassa-public/movie-theaters-demo/kettle-popper-manager
          image-status:
            status: present
            digest: sha256:12032fa0d116823f9de6
          mounts: []
          env: {}
          on-mounted-file-change:
            restart: true
  config-modified-time: 2022-04-21T08:08:42Z
  locally-deployed: false
Do the above but show all details using -v and change output format to JSON
supctl -v -j show applications
Using profile api.brewery.avassa-wallan.avassa.dev.
GET /v1/state/applications
Host: api.20-apr.b2.avassa.net:443
Content-Type: application/json
Accept: application/json, */*
Authorization: Bearer 41f7e861-ecb2-460b-bd82-45f2f01093bd
user-agent: supctl/0.1.0/535f56f54931a49b93cdc955a83564ea
----------------------------------------
HTTP/1.1 200 OK
Date: Thu, 21 Apr 2022 09:15:27 GMT
Content-Type: application/json
Content-Length: 765
Connection: close
server: Cowboy
vary: accept

[
  {
    "name": "popcorn-controller",
    "services": [
      {
        "name": "popcorn-service",
        "mode": "replicated",
        "replicas": 1,
        "share-pid-namespace": false,
        "containers": [
          {
            "name": "kettle-popper-manager",
            "image": "registry.gitlab.com/avassa-public/movie-theaters-demo/kettle-popper-manager",
            "image-status": {
              "status": "present",
              "digest": "sha256:12032fa0d116823f9de6"
            },
            "mounts": [],
            "env": {},
            "on-mounted-file-change": {
              "restart": true
            }
          }
        ]
      }
    ],
    "config-modified-time": "2022-04-21T08:08:42Z",
    "locally-deployed": false
  }
]
And the corresponding deployment
supctl show application-deployments
- name: popcorn-deployment
  application: popcorn-controller
  application-version: "*"
  placement:
    match-site-labels: system/type = edge
  config-modified-time: 2022-04-21T08:09:44Z
  status:
    oper-status: deployed
    images:
      - name: registry.gitlab.com/avassa-public/movie-theaters-demo/kettle-popper-manager
        status: present
        digest: sha256:12032fa0d116823f9de6
    selected-sites:
      - gothenburg-bergakungen
      - helsingborg-roda-kvarn
      - stockholm-sergel
      - stockholm-sture
    application-versions:
      - version: undefined
        deployed-to:
          - site: gothenburg-bergakungen
            time: 2022-04-21T08:09:51Z
          - site: helsingborg-roda-kvarn
            time: 2022-04-21T08:09:52Z
          - site: stockholm-sergel
            time: 2022-04-21T08:09:51Z
          - site: stockholm-sture
            time: 2022-04-21T08:09:55Z
In an operations scenario you are interested in inspecting the health of your deployed applications. You can get a summary of all applications
supctl show application-status summary
applications:
  - name: popcorn-controller
    application-deployment: popcorn-deployment
    oper-status: running
    deployed-to-sites: 4
    deploying: false
    all-sites-connected: true
Or you can inspect a specific application
supctl show application-status applications popcorn-controller
name: popcorn-controller
sites:
  - name: gothenburg-bergakungen
    oper-status: running
    connected: true
  - name: helsingborg-roda-kvarn
    oper-status: running
    connected: true
  - name: stockholm-sergel
    oper-status: running
    connected: true
  - name: stockholm-sture
    oper-status: running
    connected: true
The full state information for an application at a specific site can be retrieved by directing the supctl command to that specific site by using -s or --site
supctl show --site stockholm-sture applications popcorn-controller
name: popcorn-controller
services:
  - name: popcorn-service
    mode: replicated
    replicas: 1
    share-pid-namespace: false
    containers:
      - name: kettle-popper-manager
        image: avassa-public/movie-theaters-demo/kettle-popper-manager@sha256:12032fa0d116823f9de690e3a5d1b1292981314e02849c029b1805b681b2d23f
        image-status:
          status: present
          digest: sha256:12032fa0d116823f9de6
        mounts: []
        env: {}
        on-mounted-file-change:
          restart: true
config-modified-time: 2022-04-21T08:08:42Z
locally-deployed: true
application-deployment: popcorn-deployment
oper-status: running
service-instances:
  - name: popcorn-service-1
    oper-status: running
    host: stockholm-sture-001
    application-network:
      ips:
        - 172.16.0.1/16
    gateway-network:
      ips:
        - 10.21.255.2/24
    ingress:
      ips: []
    containers:
      - name: kettle-popper-manager
        id: ffb674bb8de8
        oper-status: running
        start-time: 2022-04-21T08:09:55.438Z
        current-restarts: 0
        total-restarts: 0
        probes:
          startup:
            status: success
          readiness:
            status: success
          liveness:
            status: success
It is worthwhile to stop here for a while and realize that at the top level, in Control Tower, we have some state information for an application but full state information is available at the site where it is deployed. Note well the locally-deployed flag below:
supctl show applications popcorn-controller
name: popcorn-controller
...
locally-deployed: false
...
supctl show --site stockholm-sture applications popcorn-controller
name: popcorn-controller
...
locally-deployed: true
...
Remember this going forward, in some circumstances you need to reach out the specific site to get full details.
Modifying applications and deployments
We will now delete, create and modify the popcorn-deployment using the command line.
First show it to save the payload. This time use option -c to only show the configuration, no state.
supctl show -c application-deployments popcorn-deployment
name: popcorn-deployment
application: popcorn-controller
application-version: "*"
placement:
  match-site-labels: system/type = edge
...
Now, delete the deployment. Note well, deleting the deployment will remove the applications from all sites.
supctl delete application-deployments popcorn-deployment
show application-status summary
applications:
  - name: popcorn-controller
    deployed-to-sites: 0
    deploying: false
...
And now time to create the deployment again, and verifying that they run:
supctl create application-deployments <<EOF
name: popcorn-deployment
application: popcorn-controller
application-version: "*"
placement:
  match-site-labels: system/type = edge
EOF
supctl show application-status summary
applications:
  - name: popcorn-controller
    application-deployment: popcorn-deployment
    oper-status: running
    deployed-to-sites: 4
    deploying: false
    all-sites-connected: true
When working with payloads like this, you can validate the syntax of your payload before
actually sending it to the server. This is good to learn the syntax and also work iteratively
to build the command. For this purpose you can use the --validate option. In the example below
I did a typo match-site-label instead of match-site-labels.
supctl create --validate application-deployments <<EOF
name: popcorn-deployment
application: popcorn-controller
application-version: "*"
placement:
  match-site-label: system/type = edge
EOF
errors:
  - error-message: expected one of 'all-sites', 'match-site-labels' (in mandatory choice 'select-sites')
    error-info:
      parse-error:
        path: /placement
  - error-message: "unexpected fields: match-site-label"
    error-info:
      parse-error:
        path: /placement
Command failed - 400
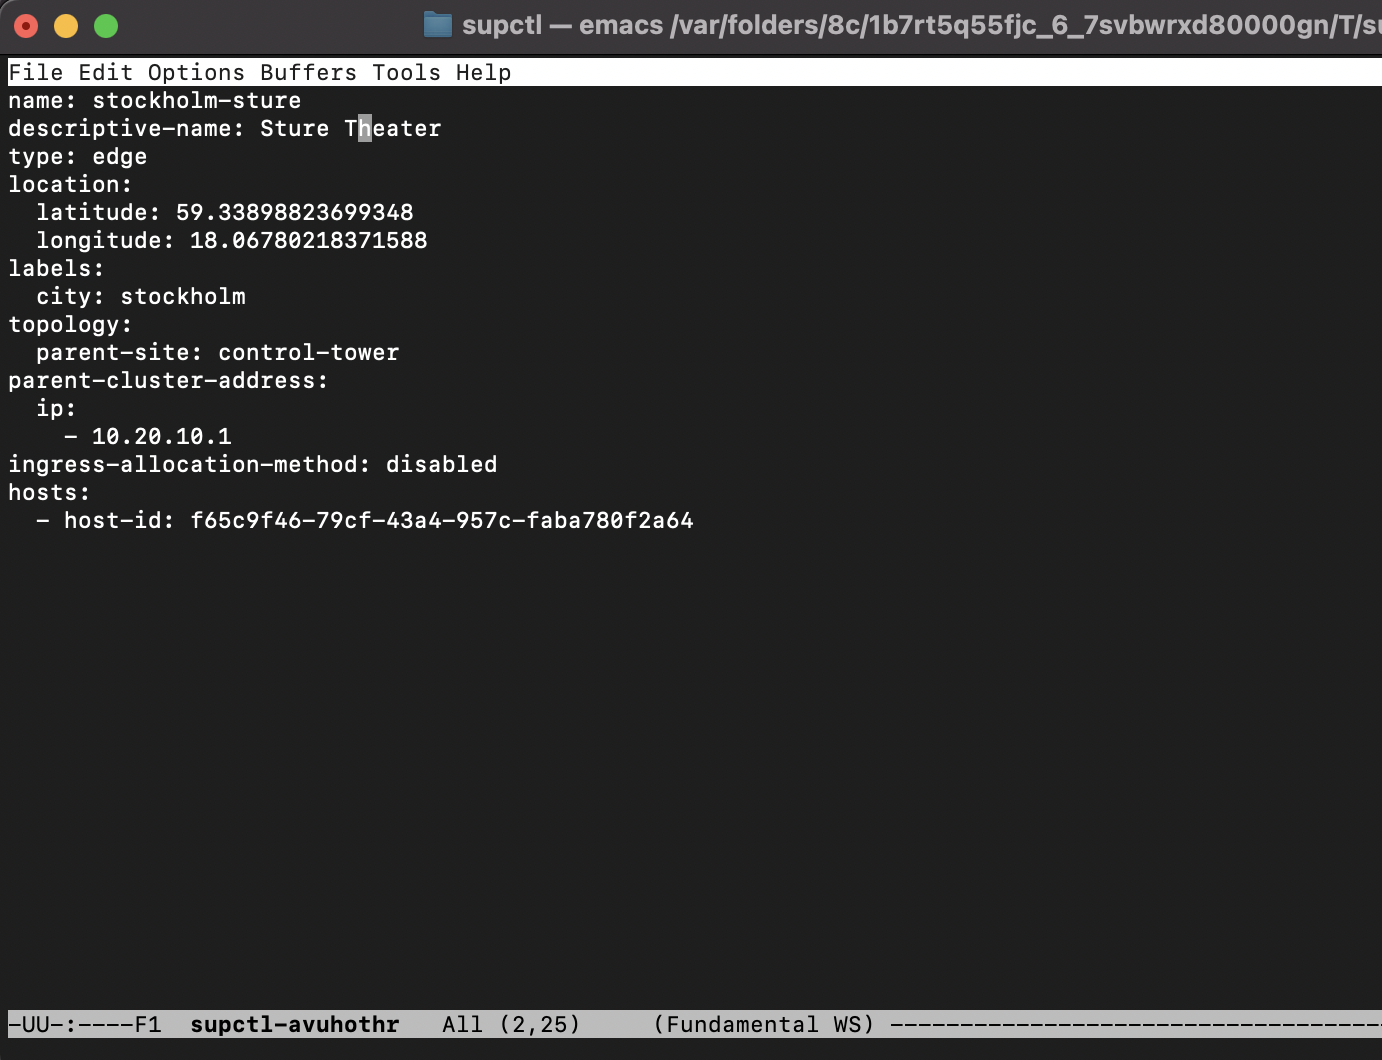
Now lets modify some configuration. One very handy way is if you have your EDITOR environment variable set.
You can then ask supctl to start your favorite editor to edit an entity.
Try the below and change the descriptive-name of the site.
supctl edit system sites stockholm-sture
 When you save and exit
 supctl will
pick up the temporary file and sent it to the Avassa system.
Another way of editing an entry is to merge configuration, assume you would like to add a label city=stockholm to one of the sites:
supctl merge system sites stockholm-sture <<EOF
labels:
    city: stockholm
EOF
To remove parts of a config you can use the replace command with the full payload or even
easier, the edit command with your favorite editor.
Many entities have actions. In order to perform an action you use the do verb. This example illustrates how
you can force a redeploy for an application-deployment:
supctl do application-deployments popcorn-deployment redeploy
The redeploy operation will re-evaluate the deployment and see if any changes are needed. In most circumstances
you will not have to do this operation after editing an application or a deployment. The system will detect and changes
and trigger required actions.
Another useful action is to restart services within an application:
supctl do --site stockholm-sture applications popcorn-controller service-instances popcorn-service-1 restart
You can also perform an exec-interactive session towards the container
supctl do --site stockholm-sture applications popcorn-controller service-instances popcorn-service-1 containers kettle-popper-manager exec-interactive sh
And now you have a shell within the container, try for example to
stop docker
/ # ps
PID   USER     TIME  COMMAND
    1 root      0:00 /sbin/docker-init -- /bin/sh -c $EXECUTABLE
    9 root      0:00 kettle-popper-manager
   12 root      0:00 sh
   18 root      0:00 ps
/ # kill 1
This also illustrates the trouble-shooting information available for
the services and containers. The restart counter has now incremented:
supctl show --site stockholm-sture applications popcorn-controller service-instances popcorn-service-1
name: popcorn-service-1
...
containers:
  - name: kettle-popper-manager
    id: 694b79b9cf35
    oper-status: running
    start-time: 2022-04-21T14:11:19.219Z
    current-restarts: 1
    total-restarts: 1
...
Checking application versions
Control Tower maintains versions of your application specification. This in order to be able to refer to older versions in your deployment. To list versions of your application:
supctl show applications popcorn-controller --version-list ```

```yaml
- "1.1"
- "1.0"
(Note, current version is not listed in the revision list).
To view the configuration of a specific version you can do:
supctl show applications popcorn-controller --version 1.0 ```


## Working with secrets
In this section we will show how you create the required secrets for the `theater-room-manager` application using `supctl`.

This requires two separate `create operations`. In Control Tower, you can have individual vaults, within each vault you can then create individual secrets with key value maps.
Since these are independent objects and can be edited individually, you need to create them separately.
```console
supctl create --validate strongbox vaults <<EOF
name: operations
distribute:
  to: all
EOF
./supctl create strongbox vaults operations secrets<<EOF
name: credentials
data:
    password: the-password
    username: the-user
allow-application-access:
  - "*"
Strongbox also manages authentication towards Control Tower. When you logged in from the Avassa cloud platform into the Control Tower you are authenticate through an OpenID service. You can see that authentication here:
supctl show strongbox authentication oidc-services
- name: avassa-cloud-account
  display-name: Avassa Cloud Account
  discovery-url: https://login.cloud.avassa.io
  use-root-ca-certs: true
  tls-verify: true
  client-id: XXX
  client-secret: XXX
  response-mode: query
  response-type: code
  default-role: avassa-cloud-account-root-role
  creation-time: 2022-04-20T14:21:40.414999Z
  distribute:
    to: none
  distribution-status:
    to: none
For more Strongbox examples and supctl see the Programming with Strongbox tutorial
Working with Volga
Volga is the built in event stream bus. It is used by the Avassa system itself but applications can also use it for their own purposes.
Read the dedicated tutorial on volga and supctl.
Working with remote registries
If your registry requires authentication, you need to create a remote registry and attach credentials.
Assuming your registry is registry.example.com:6000 and it requires username the-user and password the-password.
First create a vault where registry credentials are stored. Note distribute to none means that these credentials will not be distributed outside the Control Tower.
supctl create strongbox vaults <<EOF
name: registry-credentials
distribute:
  to: none
EOF
Then you add the credentials for the registry in the vault.
supctl create strongbox vaults registry-credentials secrets <<EOF
name: example-registry
data:
  username: the-user
  password: the-password
EOF
Finally create a remote-registry and reference the credentials
supctl create image-registry remote-registries <<EOF
address: registry.example.com:6000
credentials:
  - repository: '*'
    vault: registry-credentials
    secret: example-registry
EOF
Pull image from a remote registry
To update an image in the system you can use supctl's pull function, for example:
supctl do image-registry pull registry-1.docker.io/alpine
name: alpine:latest
digest: sha256:a777c9c66ba177ccfea23f2a216ff6721e78a662cd17019488c417135299cd89
or the example registry above
supctl do image-registry pull registry.example.com:6000/my-application:v1.0
Note if the image has not changed in the remote registry, the pull operation not update the image.
Tabular and csv output
For some commands a tabular output is easier to read than the default YAML. For that purpose supctl has an option --table or -T.
supctl --table show --site stockholm-sture applications --fields name,version,oper-status
name      oper-status
-------   -----------
popcorn   running
In some cases you would like to rename the columns like in the following case:
supctl show system sites stockholm-sture allocations --fields 'tenants/[name,applications/name]'
tenants:
  - name: tenant1
    applications:
      - name: popper
  - name: tenant2
    applications:
      - name: popcorn
A tabular output leads to two columns name
supctl --table show system sites stockholm-sture allocations --fields 'tenants/[name,applications/name]'
name      name
-------   -------
tenant1   popper
tenant2   popcorn
You can rename the column headers:
supctl -T show system sites stockholm-sture allocations --fields 'tenants/[name=tenant,applications/name=application]'
tenant    application
-------   -----------
tenant1   popper
tenant2   popcorn
You can also get a csv file as output which is useful for postprocessing purposes:
supctl --csv show system sites
Working with profiles
So far in this tutorial we have been using supctl as a single user in
a single environment. In order to ease the use of several environments
supctl supports the concept of profiles. Each profile stores
information about login information towards a certain environment.
When you first installed supctl and logged in to your account a
first profile was created.
The url towards the Avassa system is of the form environment.tenant.avassa.net. So in the examples below you have to map that to your organisation name (tenant) and environment name
If your are using supctl in the Control Tower Web UI, profiles are not available. This since you will always be logged in to the local Control Tower environment.
You can check your current profile:
supctl profile show
The active profile is edge.b2.avassa.net, set from session profile.
Host: api.edge.b2.avassa.net
Port: 443
Tenant: b2
Username: Joe Edge
Assume you have another environment far-edge.b2.avassa.net
You can create an environment to let supctl login to that one.
supctl profile create --host api.far-edge.b2.avassa.net far-edge.b2.avassa.net
far-edge.b2.avassa.net created, it is now the active profile
Now, you need to login to that environment
supctl do oidc-login
Complete the login via your OIDC provider. Launch browser to:`<URL>

Success! You are authenticated.
Profile selection is local to your shell session, meaning that if you open a
new terminal window, it will not immediately have an active profile. To
select a previously created profile, use the profile set command.
supctl profile set far-edge.b2.avassa.net
The active profile is now far-edge.b2.avassa.net
To set a default profile for all terminals, use profile set-default.
This profile will be used when no other profile is explicitly set.
supctl profile set-default far-edge.b2.avassa.net
The default profile is now far-edge.b2.avassa.net
If you have created a local Control Tower user which you want to
authenticate as, the command is supctl do login <user> and you will be
prompted for the password
supctl profile list
far-edge.b2.avassa.net (active)
edge.b2.avassa.net
And you can check the current profile
supctl profile show
The active profile is far-edge.b2.avassa.net
Host: api.far-edge.b2.avassa.net
Port: 443
Tenant: b2
Username: Joe Edge
Profile information is by default stored in $HOME/.config/supctl
See more on this in the reference guide