Multi-tenancy and users
Introduction
The Avassa system supports multi-tenancy. Each tenant is isolated so that you can split the work between organisations. There are two kinds of tenants:
- Site provider, owns the edge infrastructure and manages the sites and hosts
- Application owner, develops and deploys applications to sites
There is no strict requirement to create different tenants. If you are a single organisation both owning the sites and the applications, you may stay with just a single site provider tenant and different users. Site provider tenants can deploy applications as well.
Application owners do not have insight into site details, such as hosts. The
contract between site providers and application are any site labels defined
by the site provider. An application owner deploys applications using the site
labels (inherited from the site provider or its own configured) as targets.
Tenants are organisations, but you login as a user within a tenant. So within each tenant you have to create users.
The last piece to understand is that there are two primary authentication
methods based on how the user was created. Avassa uses OpenID Connect to be
able to authenticate towards different authentication servers. You might have
noticed the oidc-login when you first installed supctl.
When you first registered for an Avassa account in the Avassa cloud platform a user was created in the Avassa cloud platform. After you have created an environment, you can create local Control Tower users. Also, when creating a tenant organisation, you can configure that to use for example Azure AD for external authentication using OIDC.
There are two ways to restrict access:
- Users are assigned policies: policies are general access rules stating CRUDX rights on all resources in an Avassa system
- Tenants can be assigned a resource which limits access to devices, GPUs, memory, storage and CPU
We will just briefly touch on policies and resource profiles in this tutorial.
Working with users
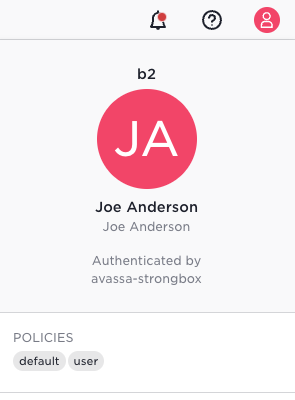
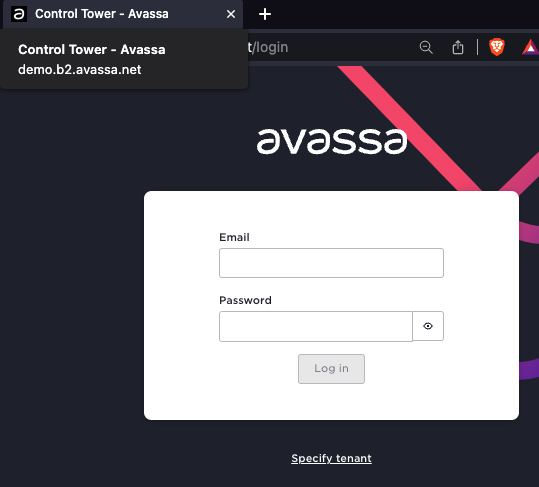
In this tutorial, we start with a site provider tenant 'b2', evident in the Control Tower URL: demo.b2.avassa.net.
Let us start with understanding users within a tenant.
As mentioned above, when you registered for an Avassa account you created a
user and password. This user lives within your site provider tenant.
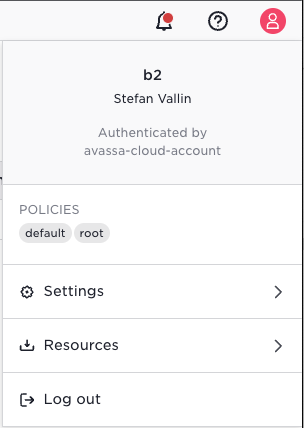
The screen shot above shows the user info and it tells:
- the tenant is
b2 - it is authenticated by the Avassa Cloud Platform, (not locally by Control Tower)
- the list of policies
We can start with adding a user to the edge tenant, assign the default policies:
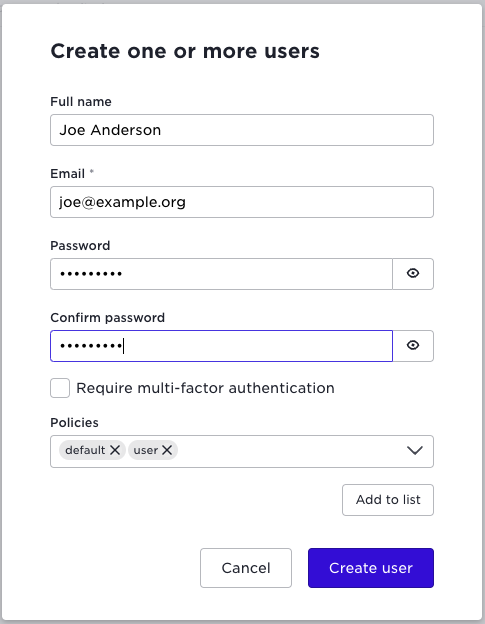
This created a local user within Control Tower, not externally in the Cloud Platform
Now lets switch to that user. (You can either logout by using the top-right menu and login as the new user or, recommended for this tutorial: use two different browsers for the different users).
If you now check the user info:
You are still within the b2 tenant, and it is a local user, since the
information does not say "Authenticated by avassa-cloud-account".
Now, switch back to the site provider tenant. (As stated above, easiest way is to keep two separate browsers open for the different users)
In this tutorial we assume that you have installed and configured supctl towards your environment. You most likely logged in as your original site provider user. This can be shown in suptctl as:
supctl profile show
Host: api.demo.b2.avassa.net
Port: 443
Tenant: b2
Username: Stefan Vallin
To switch user in supctl:
supctl do login joe@example.org
supctl profile show
Host: api.demo.b2.avassa.net
Port: 443
Tenant: b2
Username: joe@example.org
Now, in order to login back as the site provider you need to perform an oidc-login
supctl --host api.demo.b2.avassa.net do oidc-login
And since this is an oidc-login you will get the URL back to launch in your web browser to complete the login.
The secrets manager Strongbox manages users and authentication information:
supctl show strongbox authentication userpass
- name: joe@example.org
  fullname: Joe Anderson
  password: $2y$05$5zzuw7WvySUuorqRPfzE9OYtKQA8LQX2LbqetDyPuZNsO94LaS49W
  token-policies:
    - default
    - user
  token-explicit-max-ttl: 0s
  token-no-default-policy: false
  token-period: 0s
  token-type: default
  token-renewable: true
  distribute:
    to: inherit
  distribution-status:
    to: none
  derived-policies:
    - default
    - user
supctl show strongbox authentication oidc-services avassa-cloud-account
name: avassa-cloud-account
display-name: Avassa Cloud Account
discovery-url: https://login.cloud.avassa.io
use-root-ca-certs: true
tls-verify: true
client-id: BfSFH9VXNHSyoxzzPxLB8V1RV9f3rLh4
client-secret: 5uq-EKztEnDw3ktn4KIgf226EcAU90eBBwbZpA4tHU_bEiGEocLqUTb92jEG-t9m
response-mode: query
response-type: code
default-role: avassa-cloud-account-root-role
creation-time: 2022-11-04T11:27:13.569189Z
distribute:
  to: none
distribution-status:
  to: none
When creating users you have the option to enable two-factor authentication. This is not covered in this tutorial.
Working with tenants
Make sure you are back in the browser window with your original site provider user. As a site provider you create application owner tenants. The idea being that you want to give other organisations the ability to deploy applications to your sites. The application owner tenants will have limited information regarding sites, basically site labels, device labels, GPU labels, host labels etc. Application owner do not see any information regarding the individual hosts. Different application owners will not see each others data or meta-data.
Let us create an application owner tenant:
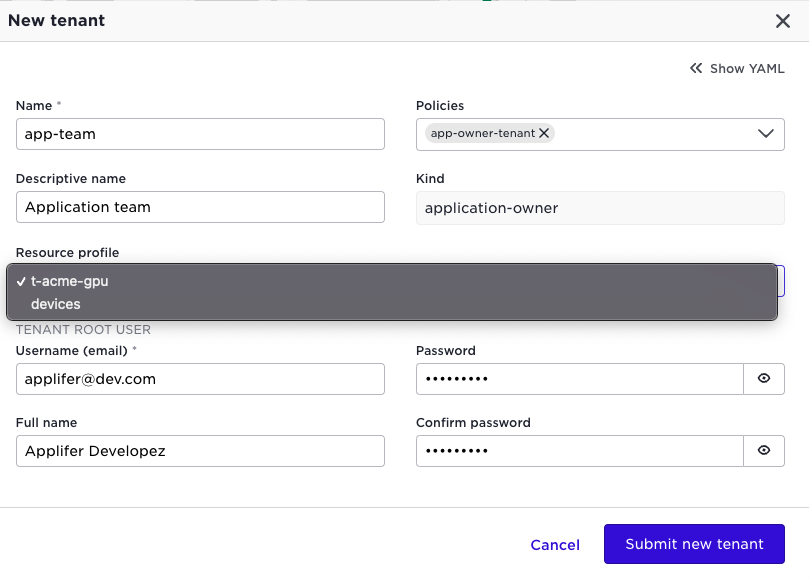
Note that the kind will be application-owner and it is given a default policy
for application owners. Also the screen shot illustrates that you have the
possibility to select a resource profile for the tenant. This will of
course apply for all users within that tenant.
That you have now created a new tenant and a local Control Tower user for that tenant.
When you save the new tenant you get the root token information:
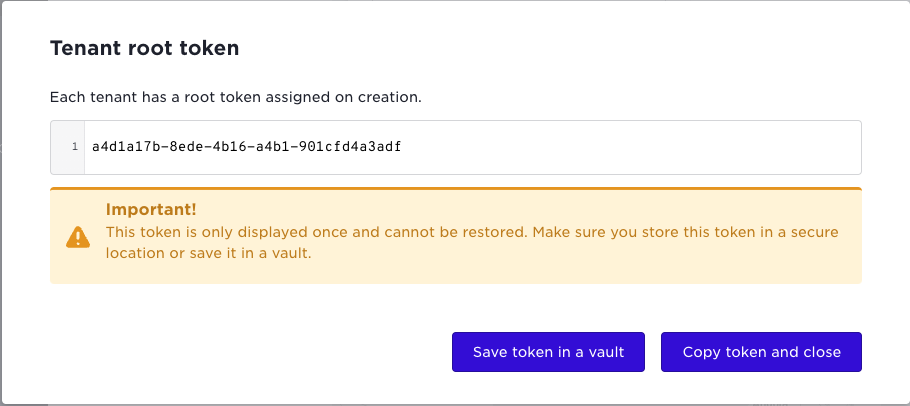
This is your recovery token for the tenant, you can use this for admin access if needed. The tenant can also revoke this key.
Lets give the application owner access to some selected sites.
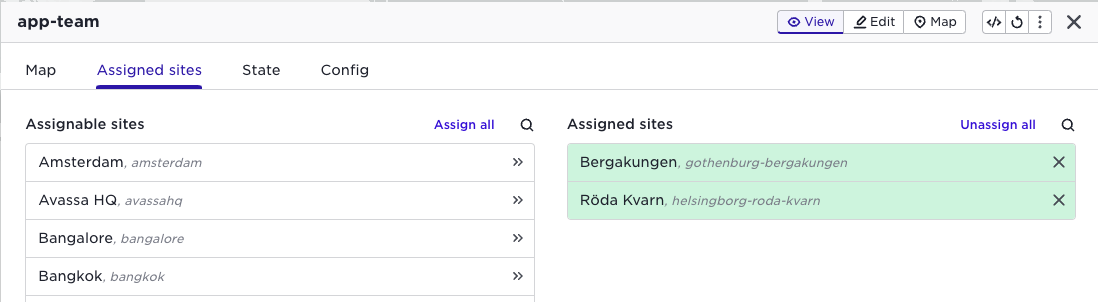
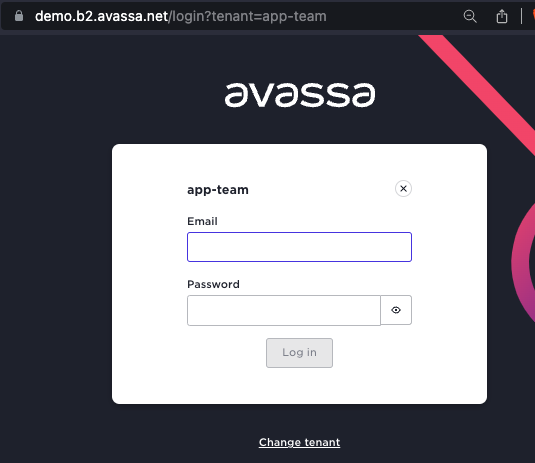
Now, in a separate browser, login as the user of that tenant. Make sure that you change tenant before entering the user information by clicking the "Specify tenant" link:
Enter the "app-team" tenant:

Now in the login-screen note the url that includes the tenant name:
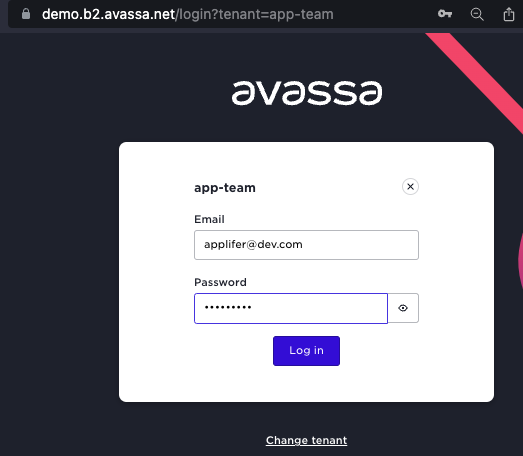
Time to enter the user login for the new tenant:
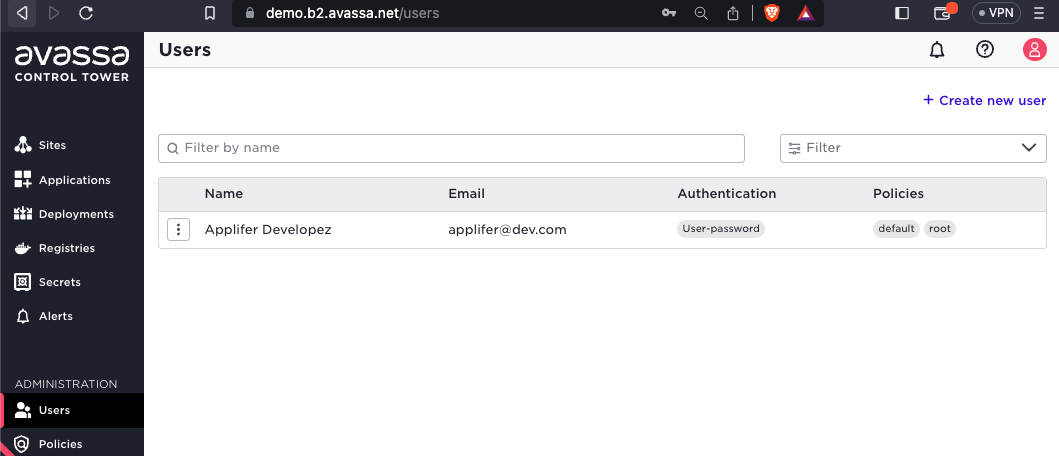
You can also validate that your login-user is a local user in this tenant:
The first thing you will probably notice is that you do only see the two sites that was assigned to you by the site provider: If you select a site you will only see limited site information, basically meta-data and the labels
Create tenants using CLI
First create the tenant.
supctl create tenants <<EOF
name: app-team
kind: application-owner
policies:
  - app-owner-tenant
EOF
Next we will create the root token for this tenant.
supctl do strongbox token create-root --name app-team
Warning: Providing --name on the command line is insecure. Consider using --name-prompt instead.
{
  "accessor": "c51e2c8d-1cab-4d36-9880-294bc5529059",
  "token": "87297109-6a8f-47ef-8f0e-882d96e9967b",
  "creation-time": "2023-01-16T11:36:10.549630Z"
}
Make sure you take note of the token above, it will be used in subsequent supctl calls below. You can only call create-root once.
The root token can be used as an entry into the tenant, like a root user.
Next create a tenant user
supctl -t 87297109-6a8f-47ef-8f0e-882d96e9967b create strongbox authentication userpass <<EOF
name: admin@app-team.com
fullname: Administrator
password: SuperSecretPassword!
metadata:
  email: admin@app-team.com
token-policies:
  - root
EOF
With the above, the admin@app-team.com user can login.
At this stage you can revoke the tenants root token, or store it in a secure location for future tenant administration.
supctl do strongbox token revoke --token 87297109-6a8f-47ef-8f0e-882d96e9967b
Next we will assign a couple of sites to the tenant, note that this is done using the parent tenant.
supctl create tenants app-team assigned-sites <<EOF
    name: "stockholm-cluster"
EOF
supctl create tenants app-team assigned-sites <<EOF
    name: "home-rpi"
EOF
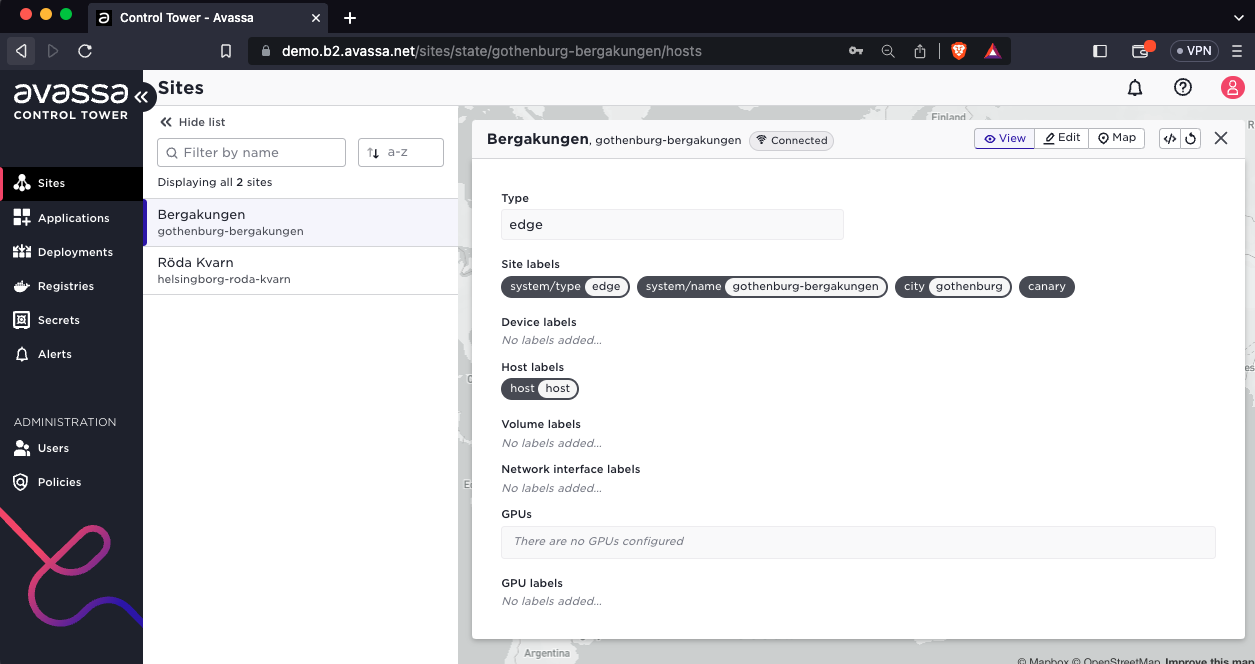
Labels and multi-tenancy
As a site provider you can create two types of labels:
- inherited by application owner tenants
- only visible for users within your tenant, we call them "private labels"
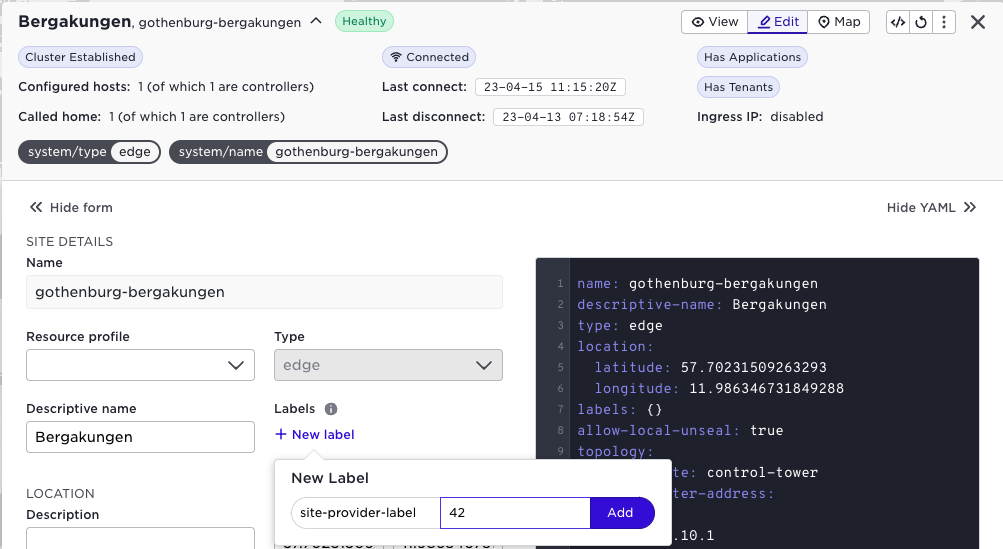
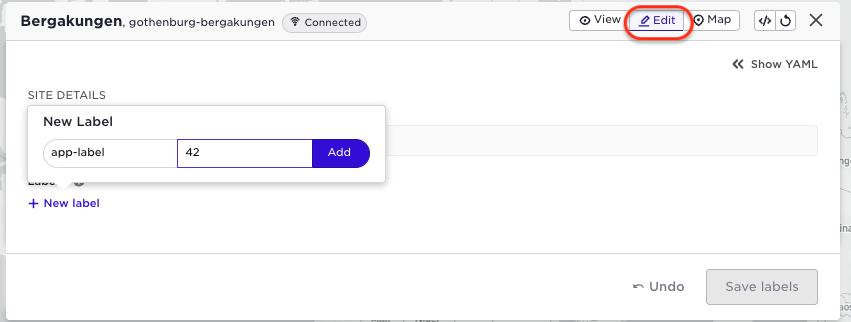
The screen shot below illustrates how to create a label of type 1, inherited by the application owner tenants:
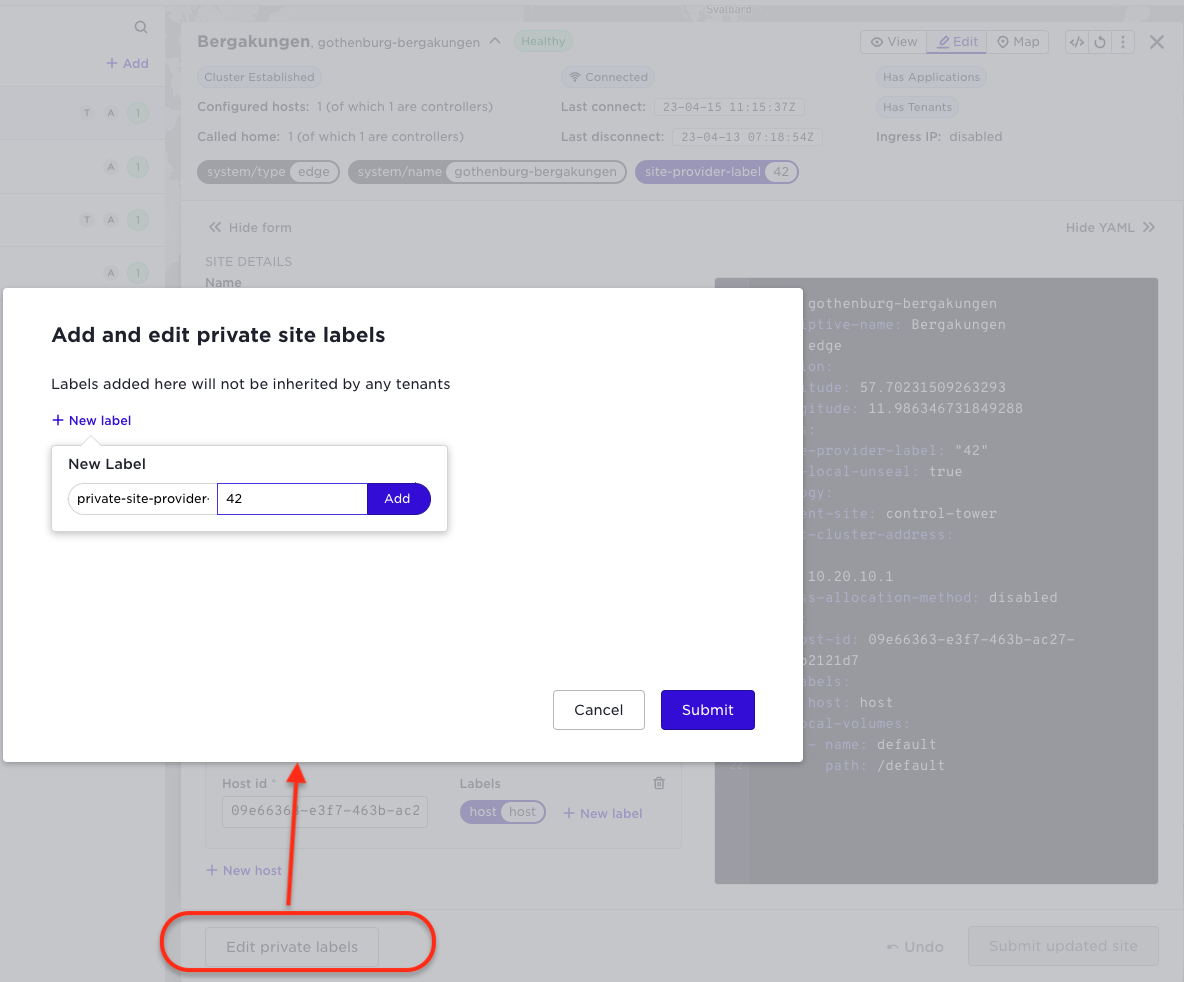
In order to create a label that is only visible for users within the site provider tenant press the "Edit private labels" button:
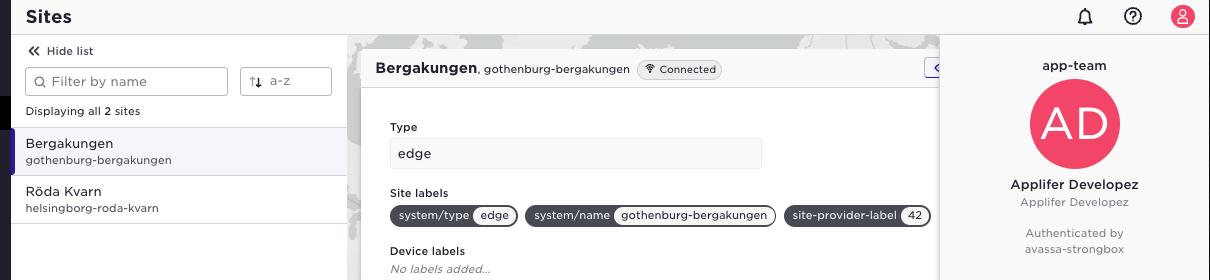
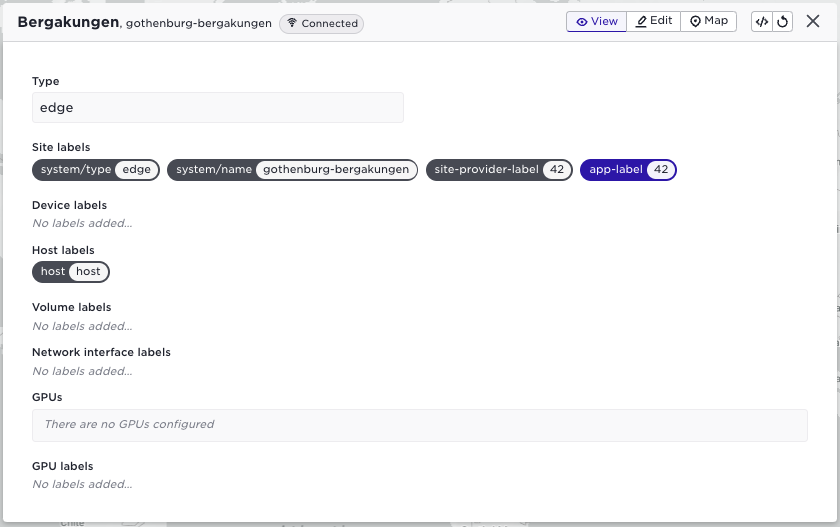
In the header for the site you see the new labels in different colours:

Validate that you see only the first label by using the browser where you are logged in as the application owner:
And of course as an application owner you can create your own labels as shown below:
And this label will also be indicated with a different colour:
Details on the data model for multi-tenancy
In thre previoius section we did show how different tenants could created different kinds of labels. We will now explain this in more detail in order to perform the functions over APIs or the Avassa command line.
As a site provider you can create labels at system/sites and these will then be inherited by application owners.
When a site provider assign sites to an application owner these sites appear at assigned-sites for the application owner. When the application owner deploys applications or define labels this is the resource that is configured.
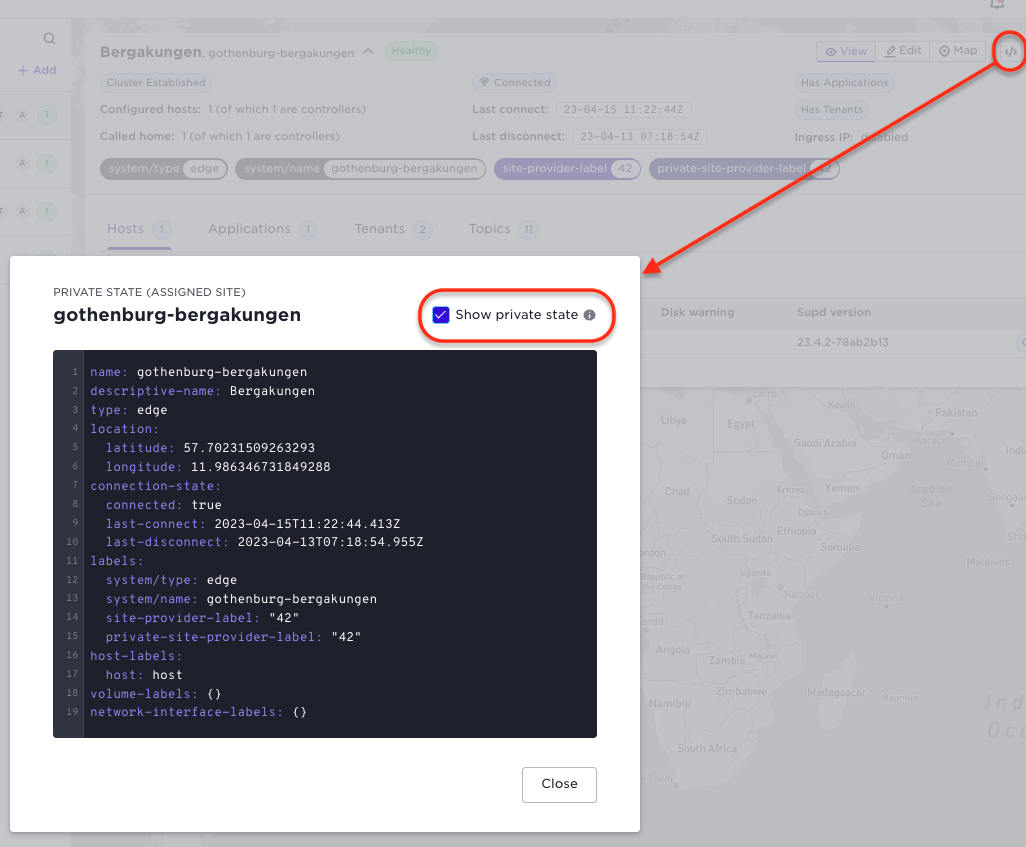
The final piece to understand now is how private labels are configured in the data-model. As a site provider you can create your own assigned sites and labels you configure there are only seen by your tenant. When you create private labels in the UI, the UI automatically creates the assigned sites for you.
This is a good time to inspect this using supctl.
We are now logged in as the site provider:
supctl show system sites gothenburg-bergakungen --fields labels
labels:
  system/type: edge
  system/name: gothenburg-bergakungen
  site-provider-label: "42"
You can see your tenants
supctl show tenants
- name: app-team
  descriptive-name: Application team
  kind: application-owner
  parent: b2
  policies:
    - app-owner-tenant
As a site provider, if you check your assigned sites:
supctl show assigned-sites gothenburg-bergakungen --fields labels
labels:
  system/type: edge
  system/name: gothenburg-bergakungen
  site-provider-label: "42"
  private-site-provider-label: "42"
...
Now swith user in supctl to the app owner.
As the app owner
supctl --host api.demo.b2.avassa.net do login applifer@dev.com
supctl show system sites
Command failed - 403
Since you are not a site provider you do not "own" any sites. However you where assigned sites by your site provider:
supctl show assigned-sites gothenburg-bergakungen --fields labels
labels:
  system/type: edge
  system/name: gothenburg-bergakungen
  site-provider-label: "42"
  app-label: "42"
Inspecting assignes sites YAML in the UI
As explained above a site provider has private configuration under assigned-sites. The corresponding YAML configuration is available by first selecting the </\> YAML button and then choose "Show private state"
Deploying applications as an application owner
Make sure you are now in the browser window where you are loggin as the application owner.
Create the popcorn application as in the first introductory tutorial:
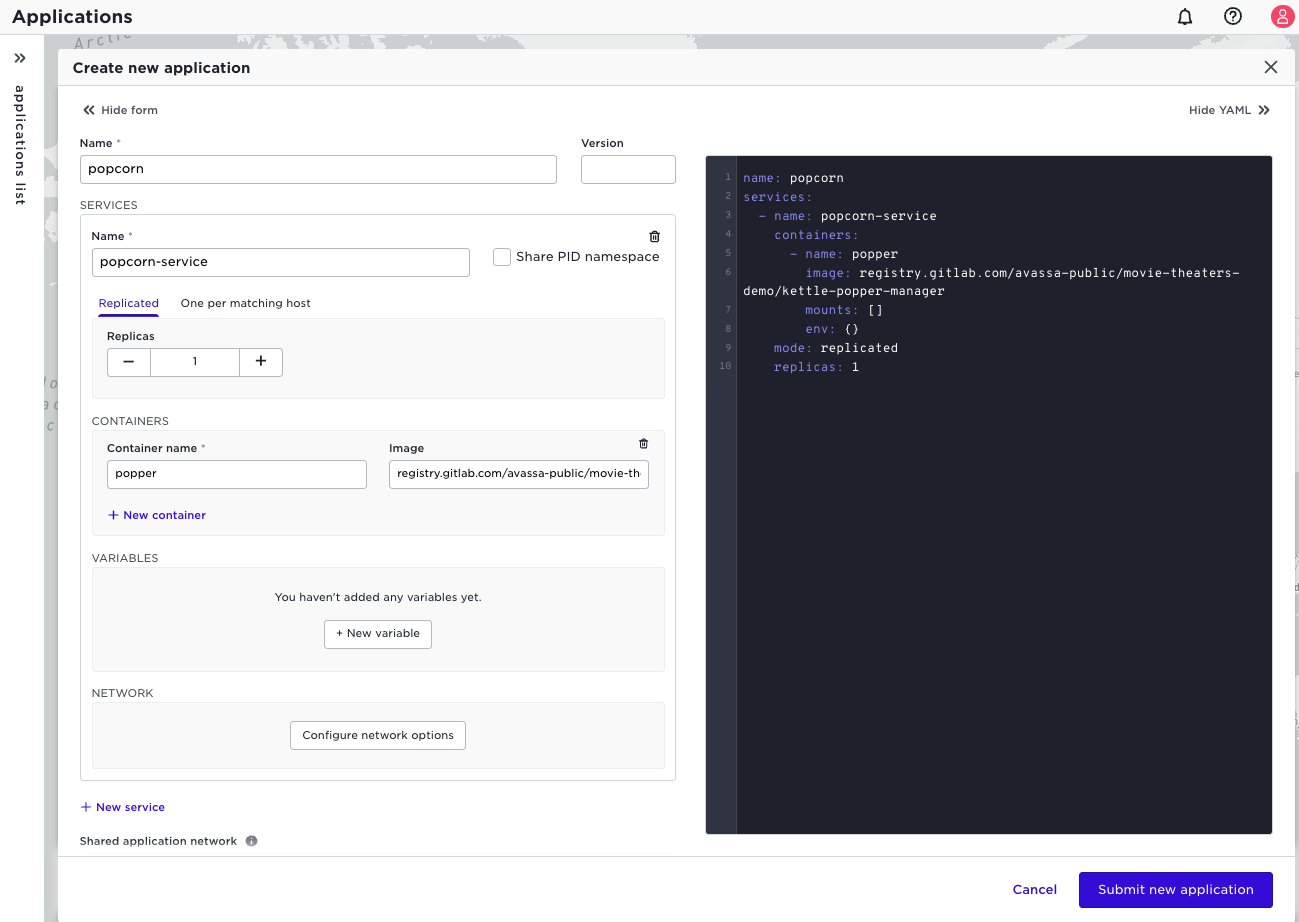
Make sure you did set the image registry information correct by validating that the state of the container is "present".
And now, create a deployment and use the label that you created as an application owner:
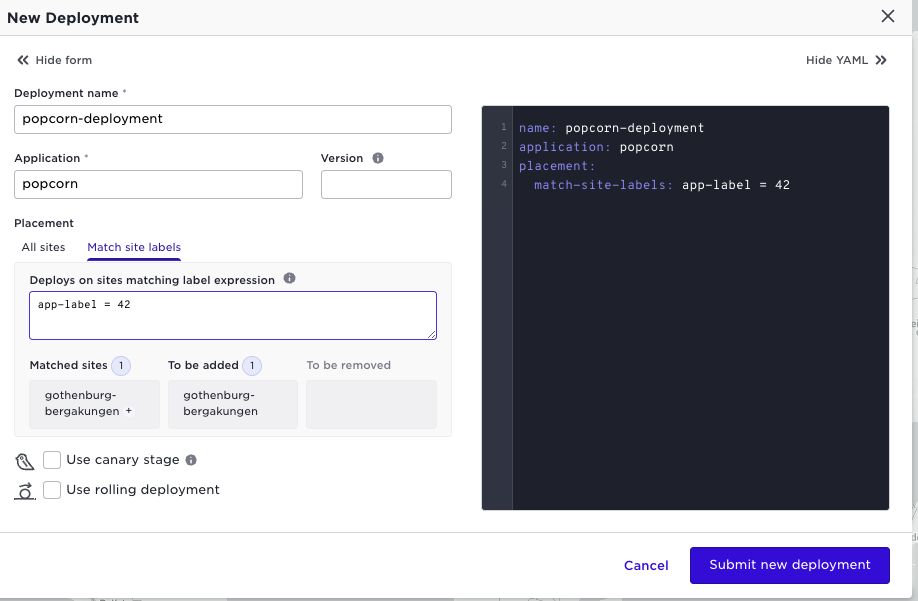
This illustrated that you only have access to the sites that where assigned to you and that you can use inherited and your own labels for deployment placement.
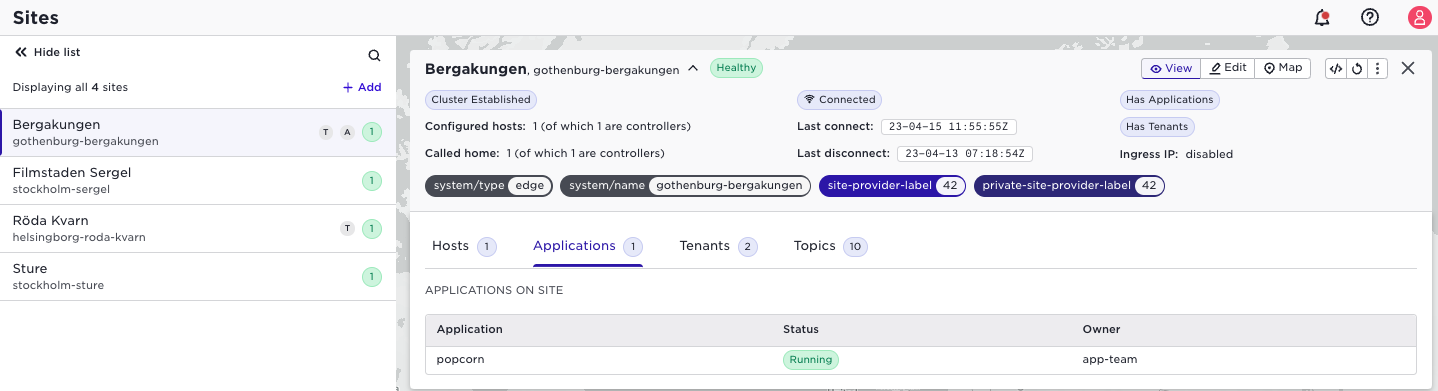
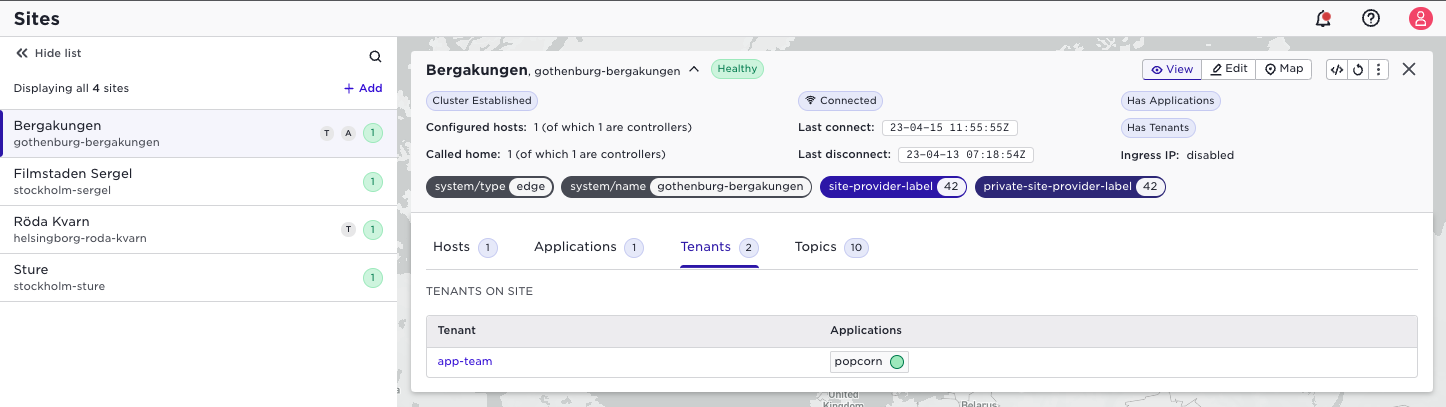
Site provider view of application owners
Make sure you are back in the window where you are logged in as the site
provider and have supctl logged in as your site provider.
As the site provider the list of applications and deployments are empty since they are deployed by the application owner tenant.
You will however have some access to meta-data around this (b2 is "yourself"):
supctl show system sites gothenburg-bergakungen allocations
tenants:
  - name: app-team
    applications:
      - name: popcorn
  - name: b2
    applications: []
This is useful information as a site-provider to be able to proactively inform application owners about impact of planned maintenance for example.
The above is available in the User Interface as well. (Note well you are the site provider in this case.) To the left in the list of sites, you will see indications if there are tenants (T) and/or applications (A) on the site. After selecting a site you can drill down to see which applications and tenants are active: