Deploy your first application
This tutorial guides you through the steps to deploy your first application on the Avassa Platform. It assumes that you have set up an environment as described in the first environment tutorial.
We have made all the code and artifacts used in the example available in our public GitLab repository.
Check the status of the sites
This scenario includes two sites Electric Cinema - London and Metrograph - New York that have been pre-provisioned, have called home and are available to receive application deployments.
 .
.
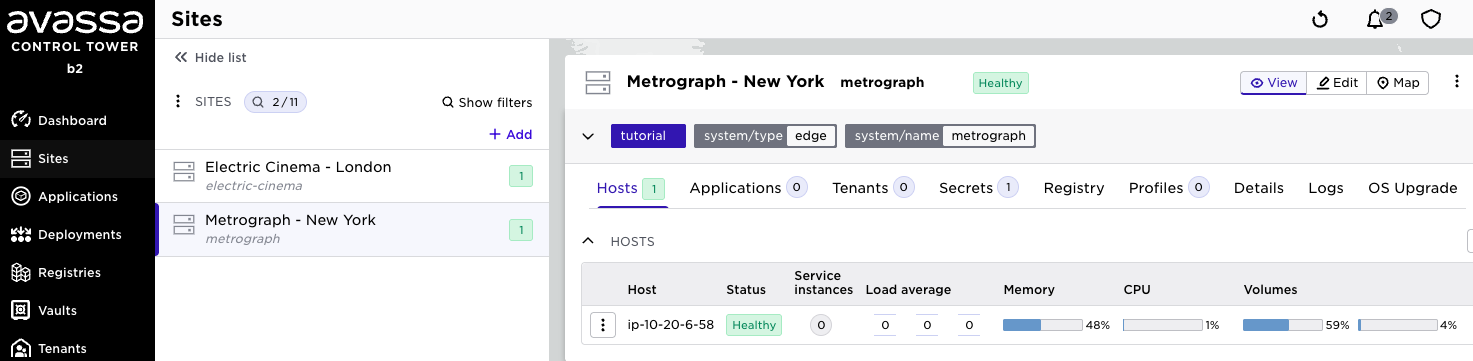
To inspect the status of a site, click Sites in the sidebar and select any site in the list. In the site list you have an icon indicating the overall health of the site (green/red) and a number indicating how many hosts are running on the site.
In the top section of the site window you will see labels such as system/type . The Avassa system automatically assigns labels (indicated in grey), you can configure labels (indicated in blue), and you can define rules that will set labels based on discovered devices such as cameras. Labels are used to control the application placement.
Further down in the window you see the list of hosts that have called home from the site. You can inspect host details by clicking host details in the host menu (three dots left of host name).
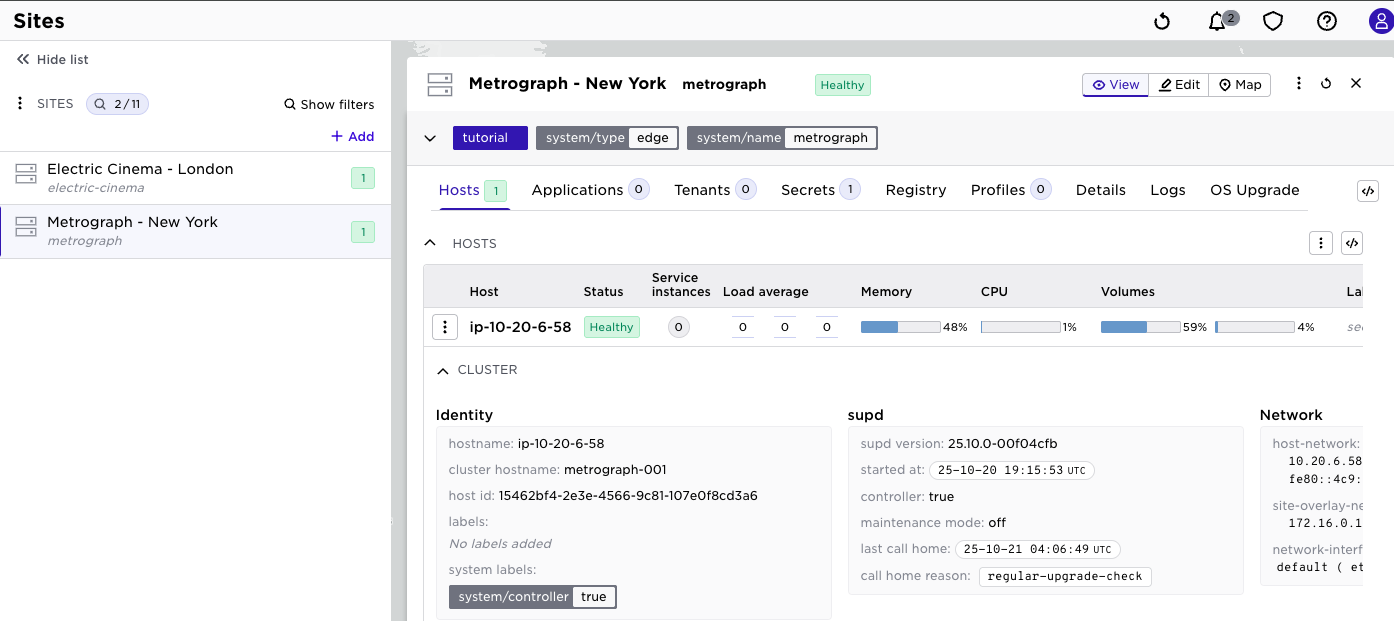
This gives an overview of the host health like disc, memory and load. You will also see platform details.
Register the application
To deploy an application using the Avassa Platform, you need to register an application specification that defines the structure and content of the application, and a deployment specification that defines where the application shall be deployed, (based on labels).
In this tutorial you will define a very simple application popcorn-controller consisting of a single container kettle-popper-manager that manages all the popcorn machines in the theaters it is deployed in.
Click Applications in the sidebar, then click Add.
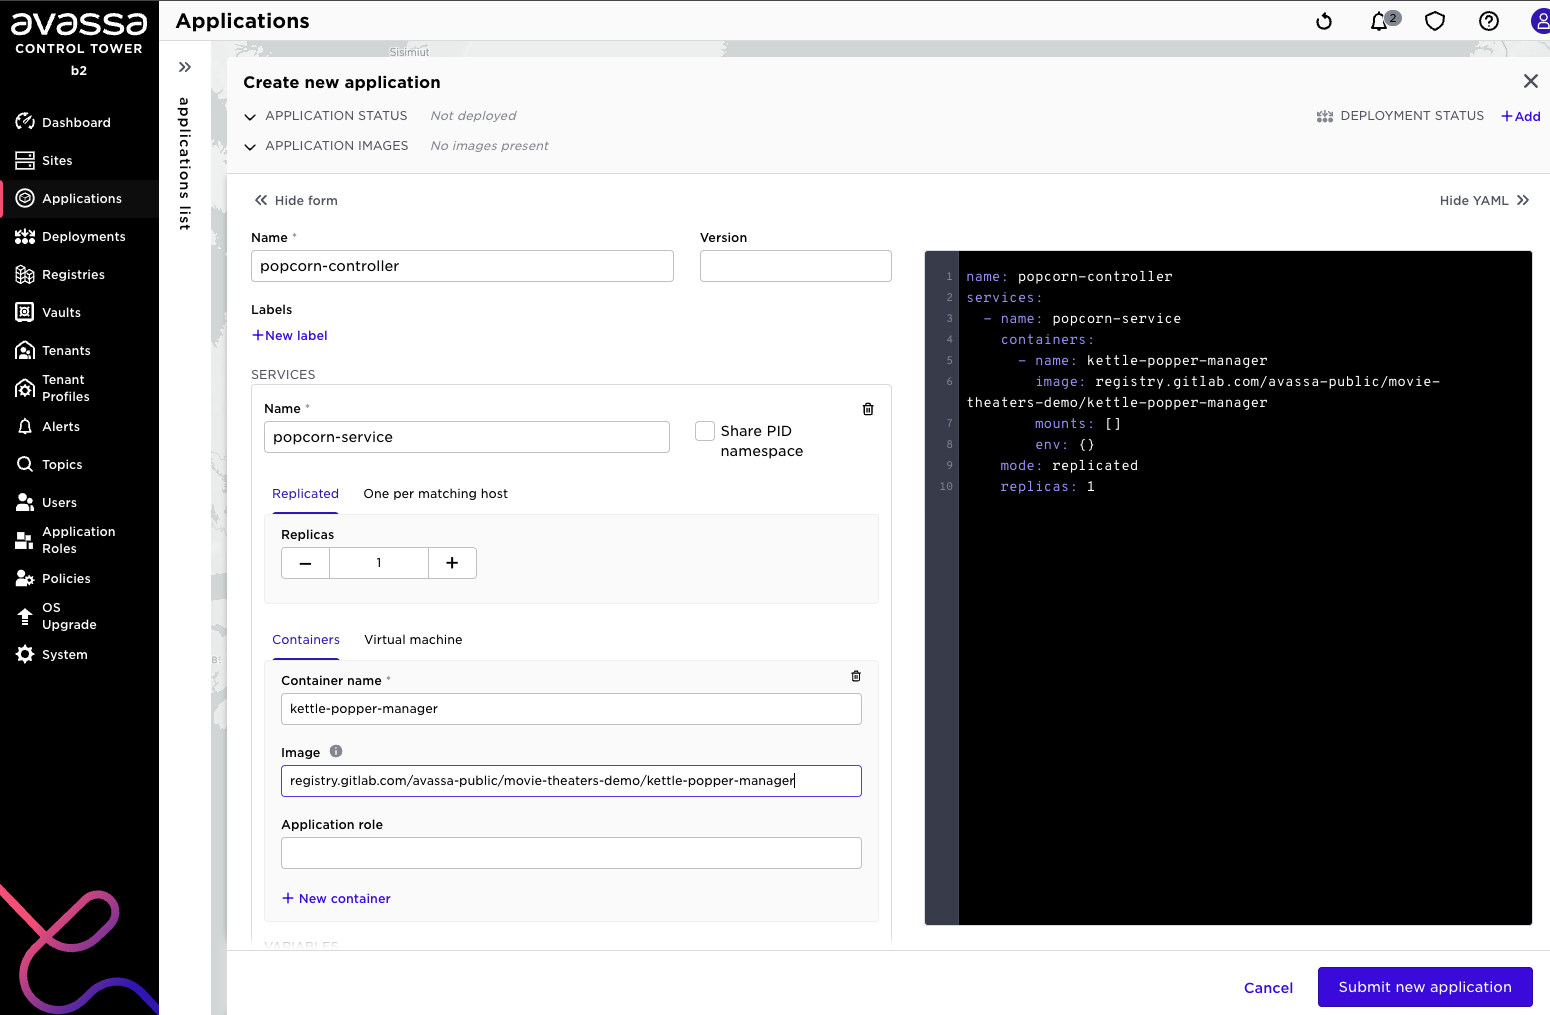
Name the application popcorn-controller, and add a service popcorn-service. Click New container, name it kettle-popper-manager and add the the following path for the image: registry.gitlab.com/avassa-public/movie-theaters-demo/kettle-popper-manager.
A service is a way to partition your application into groups of containers. A service is also the granularity of the scheduler at edge sites, services can be scheduled across hosts.
Click Submit new application.
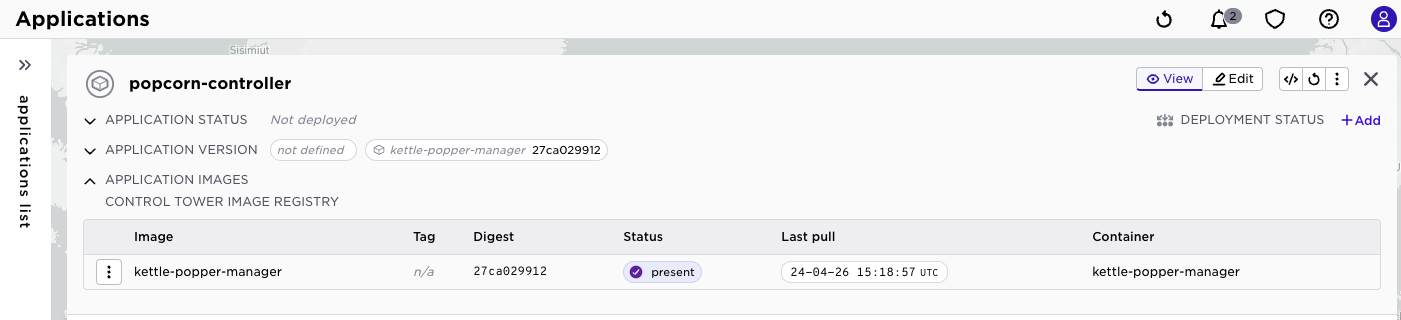
You want to make sure that the image has been found, and has been made available to the internal registry before deploying it. Control Tower loads the images from external registries into an internal registry. When deploying to the edge sites, the images are then distributed to those as well in order for them to manage a restart without connection to Control Tower or external registries.
Click the View button for the application. You will see that the Control Tower is pulling, or has finished pulling, the container image.
Deploy the application
Since you have popcorn machines in all theaters, you want the system to create a deployment that places the popcorn-controller application in all sites of type edge. As mentioned above the system assigns labels to sites, and you can add your own labels as well. This will be shown later.
Click Deployments in the sidebar, then click Add.
Name the deployment popcorn-deployment, add popcorn-controller as the application, select All sites as placement. You will now see the list of sites that the application will be deployed on.
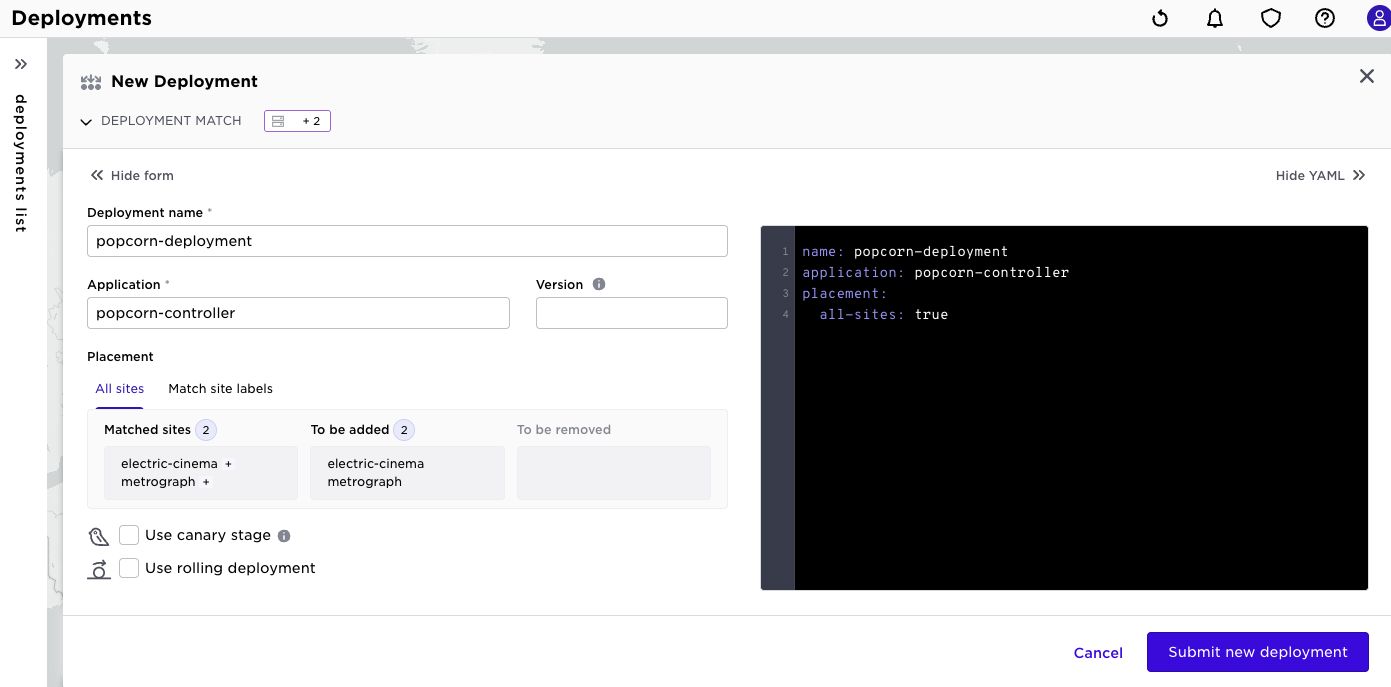
Click Submit new deployment to start the deployment process.
Check the status of the application deployment
To inspect the status of the deployed application, click View button top right.
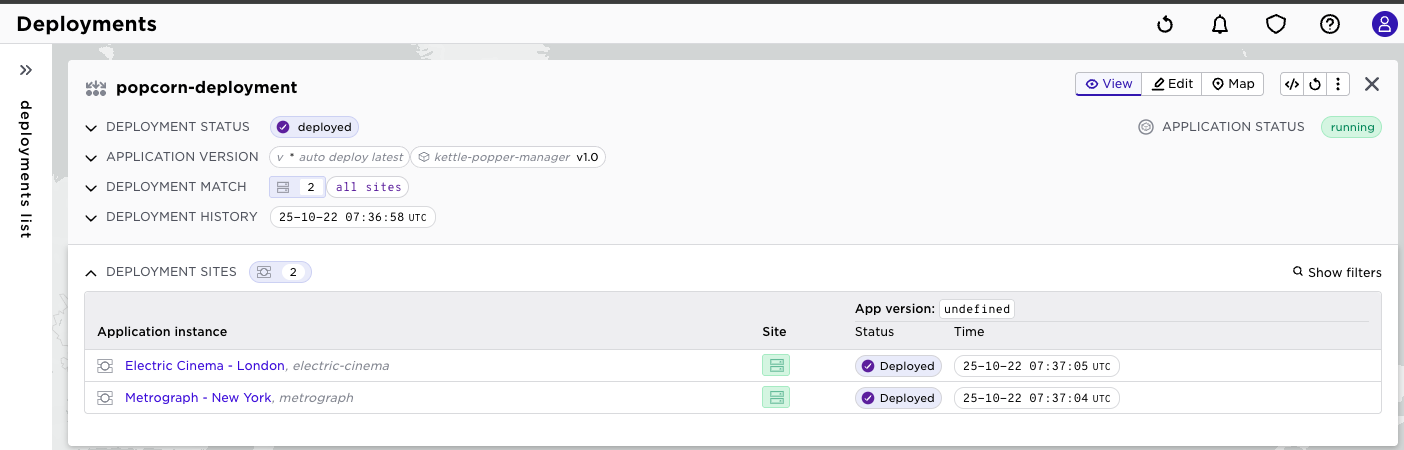
Before moving on let us elaborate on the state of a deployment versus the state of an application. Deployments are limited in time, they have an end-state Deployed. Applications on the other hand do not have an end state, they have a current operational state. So that the application was deployed indicates that it started at the time of the deployment. If you would like to inspect the current operational state of the application on a specific site, you can click the site link in the deployment view above.
This will navigate to the application view for that site:
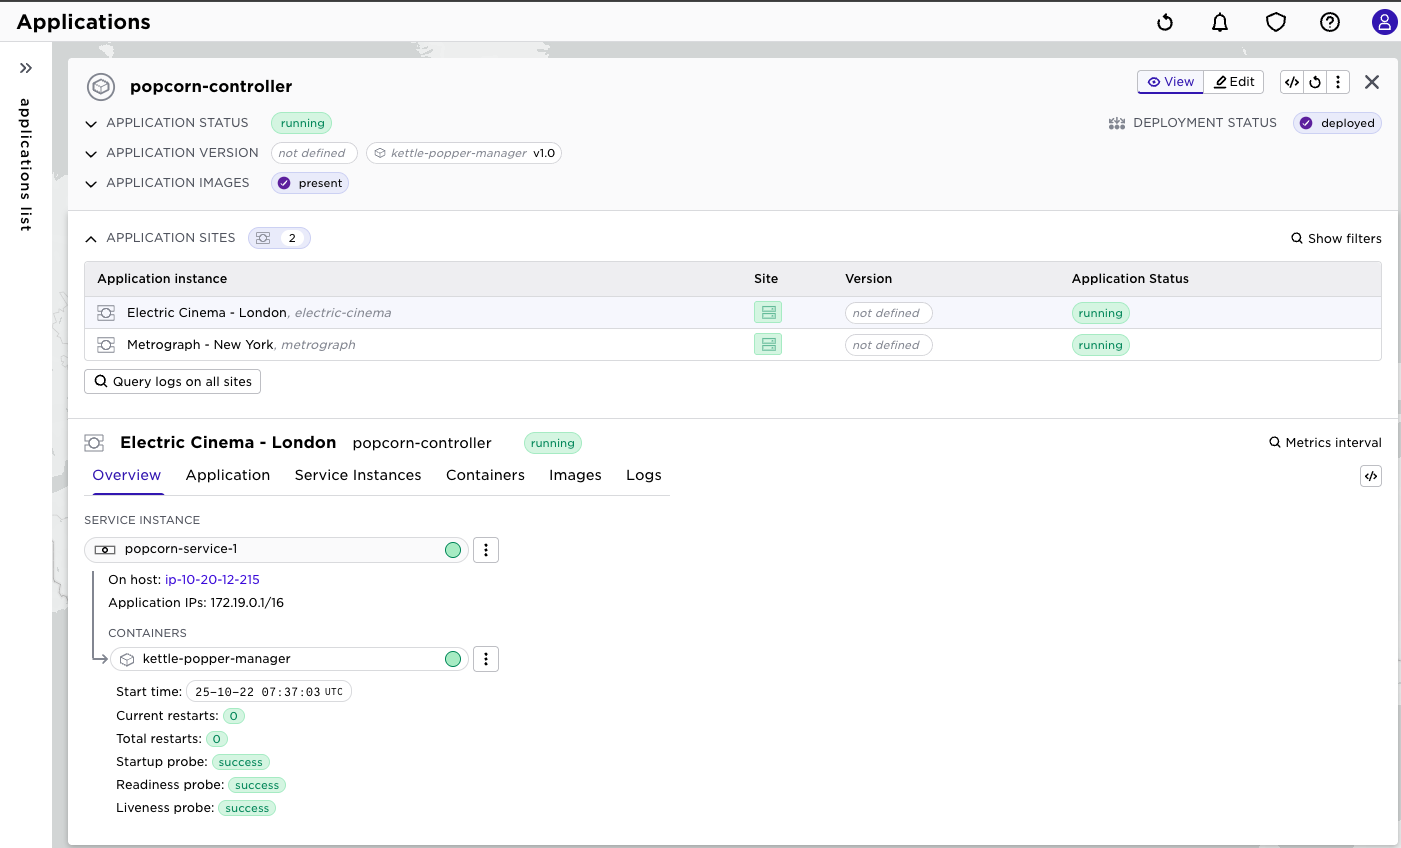 .
.
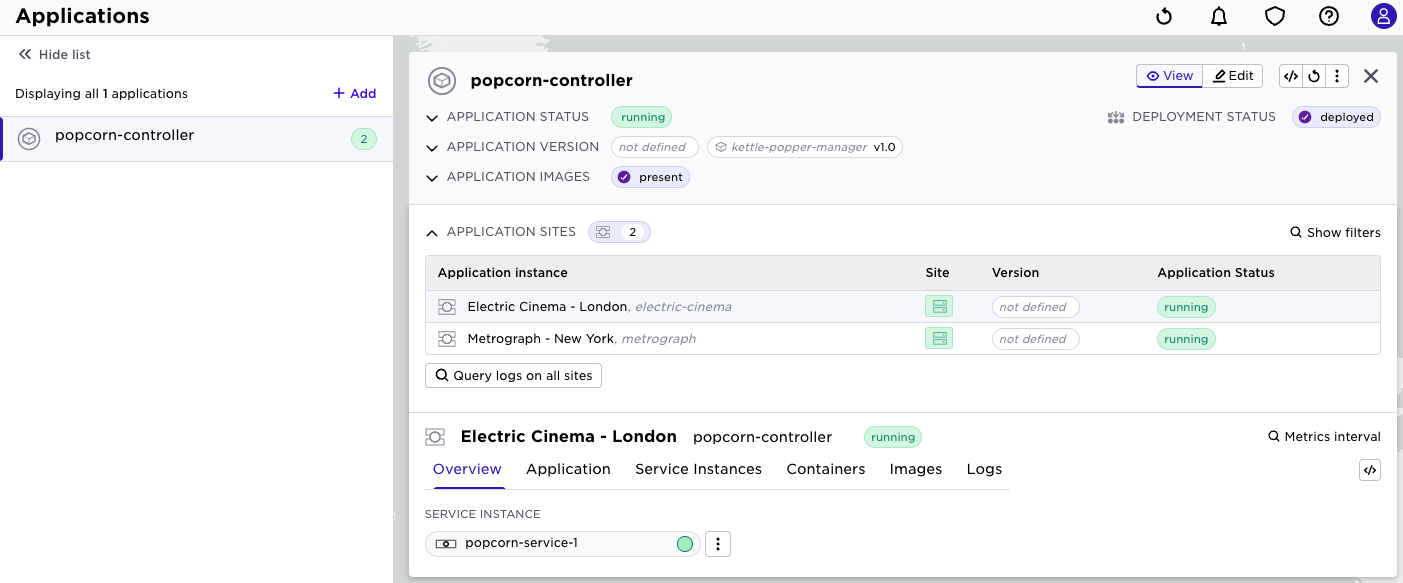
That same view is also available by navigating the applications menu:
Application logs
You can pick up the container logs from the application view by clicking the Logs button in the top right corner.
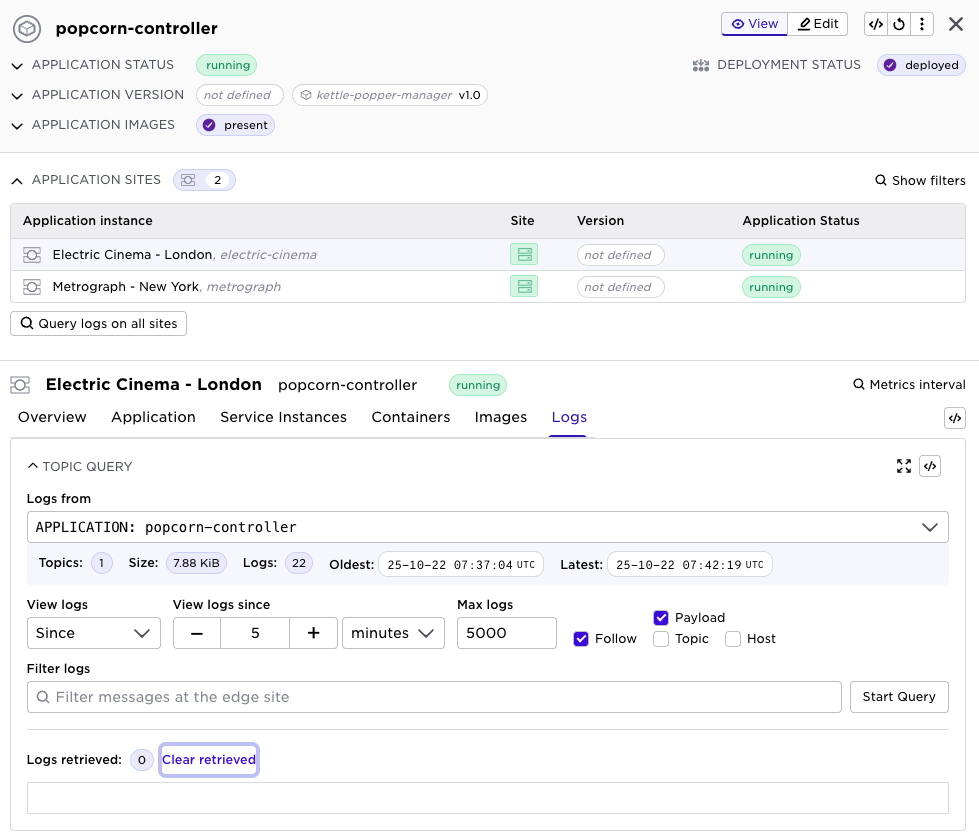
Press Start Query to see the logs from the container. Follow will keep the log view updated as new log entries are created.
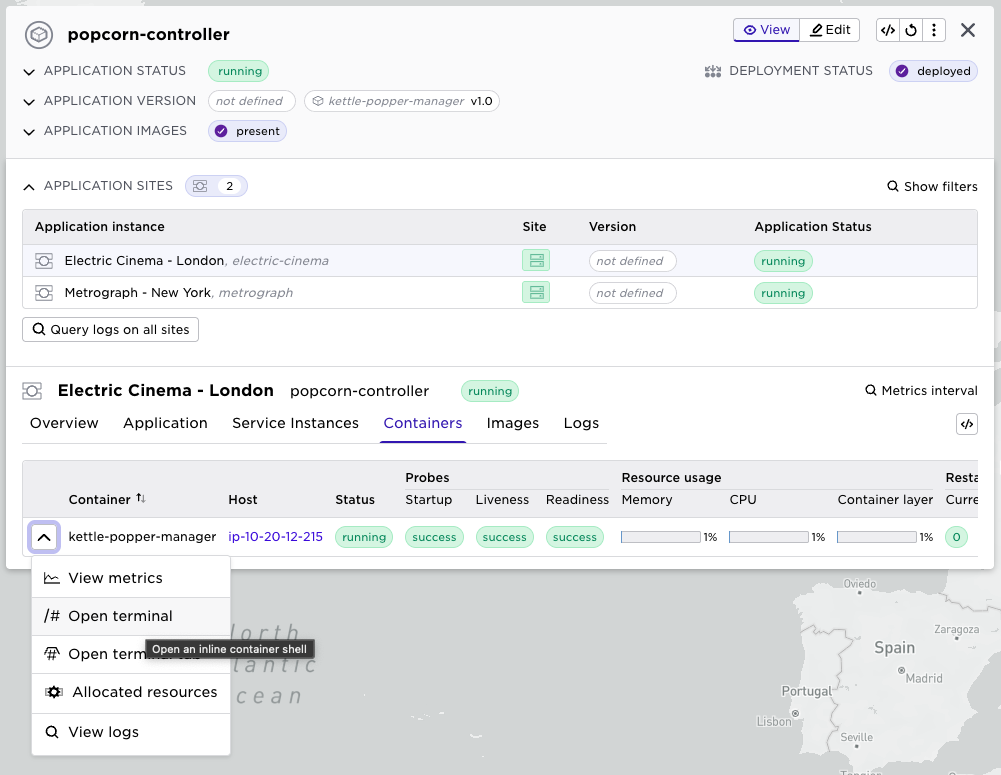
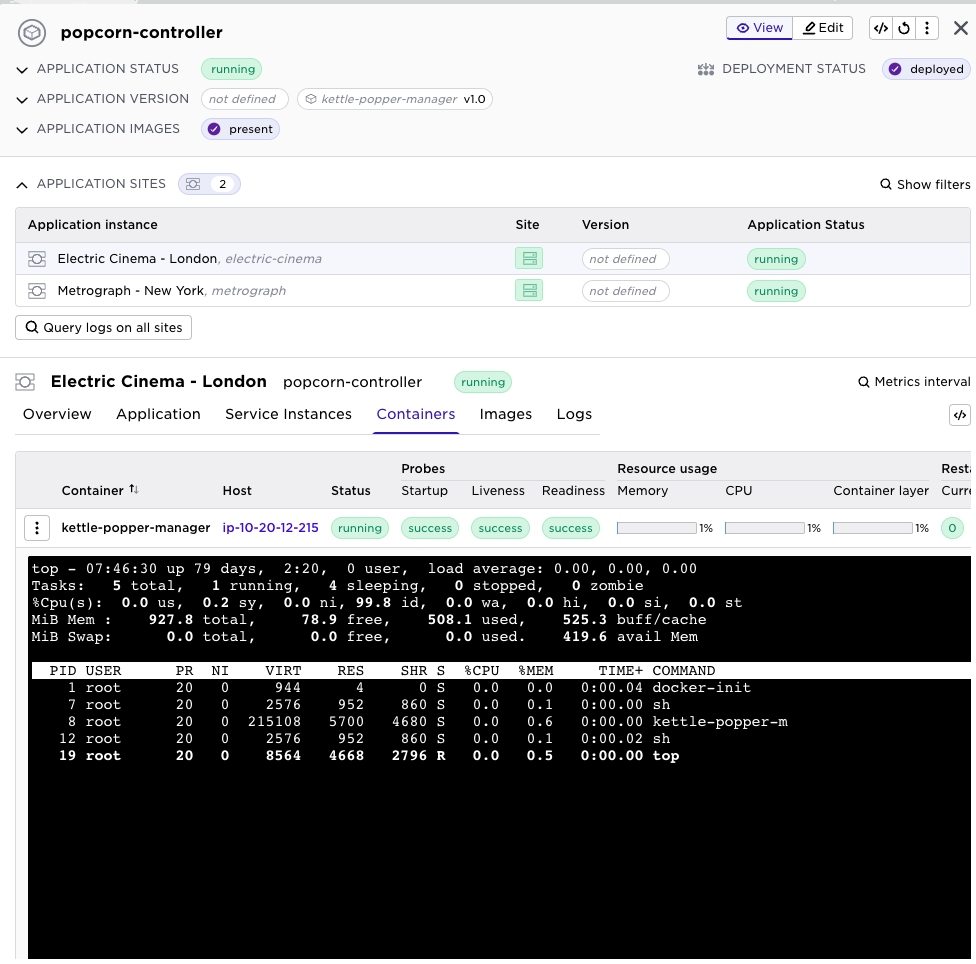
Container shell
You can also get a shell into the running container by clicking the Containers tab and select Exec interactive` button in the top right corner.
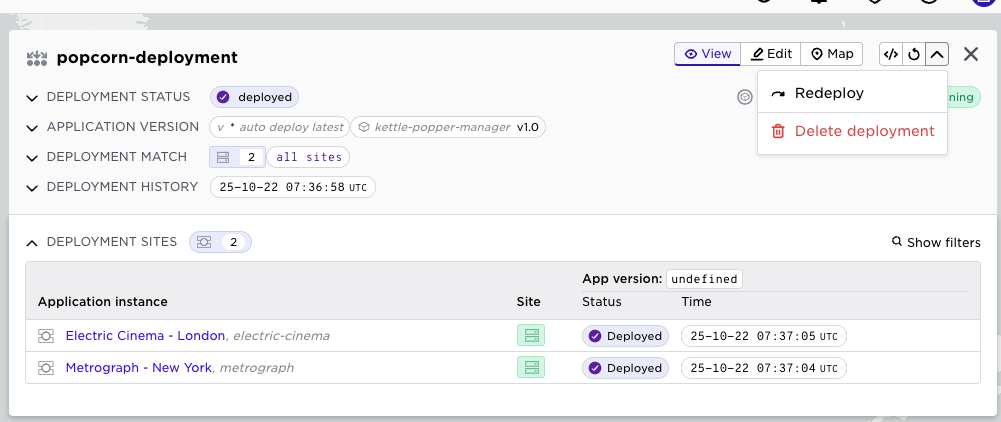
Undeploying the applications
In order to remove the applications from the site, you just delete the deployment.
This is done by selecting Deleteon the configuration tab for the deployment.
In order to clean up the system you can also delete the application specification in the same way.
Conclusion
You have now deployed a single-container application with images from a remote registry.