Keycloak as OIDC Provider
This how-to describes how to configure Keycloak as an OpenID Connect (OIDC) provider for an existing tenant in an Avassa system.
If you want to create a new tenant, you can follow the Entra documentation, which
describes how to create a new tenant. Note that you need to use the -t syntax
in the supctl commands below in that case.
In this how-to, make sure you replace test.example.avassa.net with the correct URL
for your environment.
Configure Keycloak
Make sure you have selected the correct realm in Keycloak, or create a new one if needed.
Create a new client in Keycloak for the Avassa system.
If you change the Client ID, make sure to update the client-id in the Avassa configuration as well.
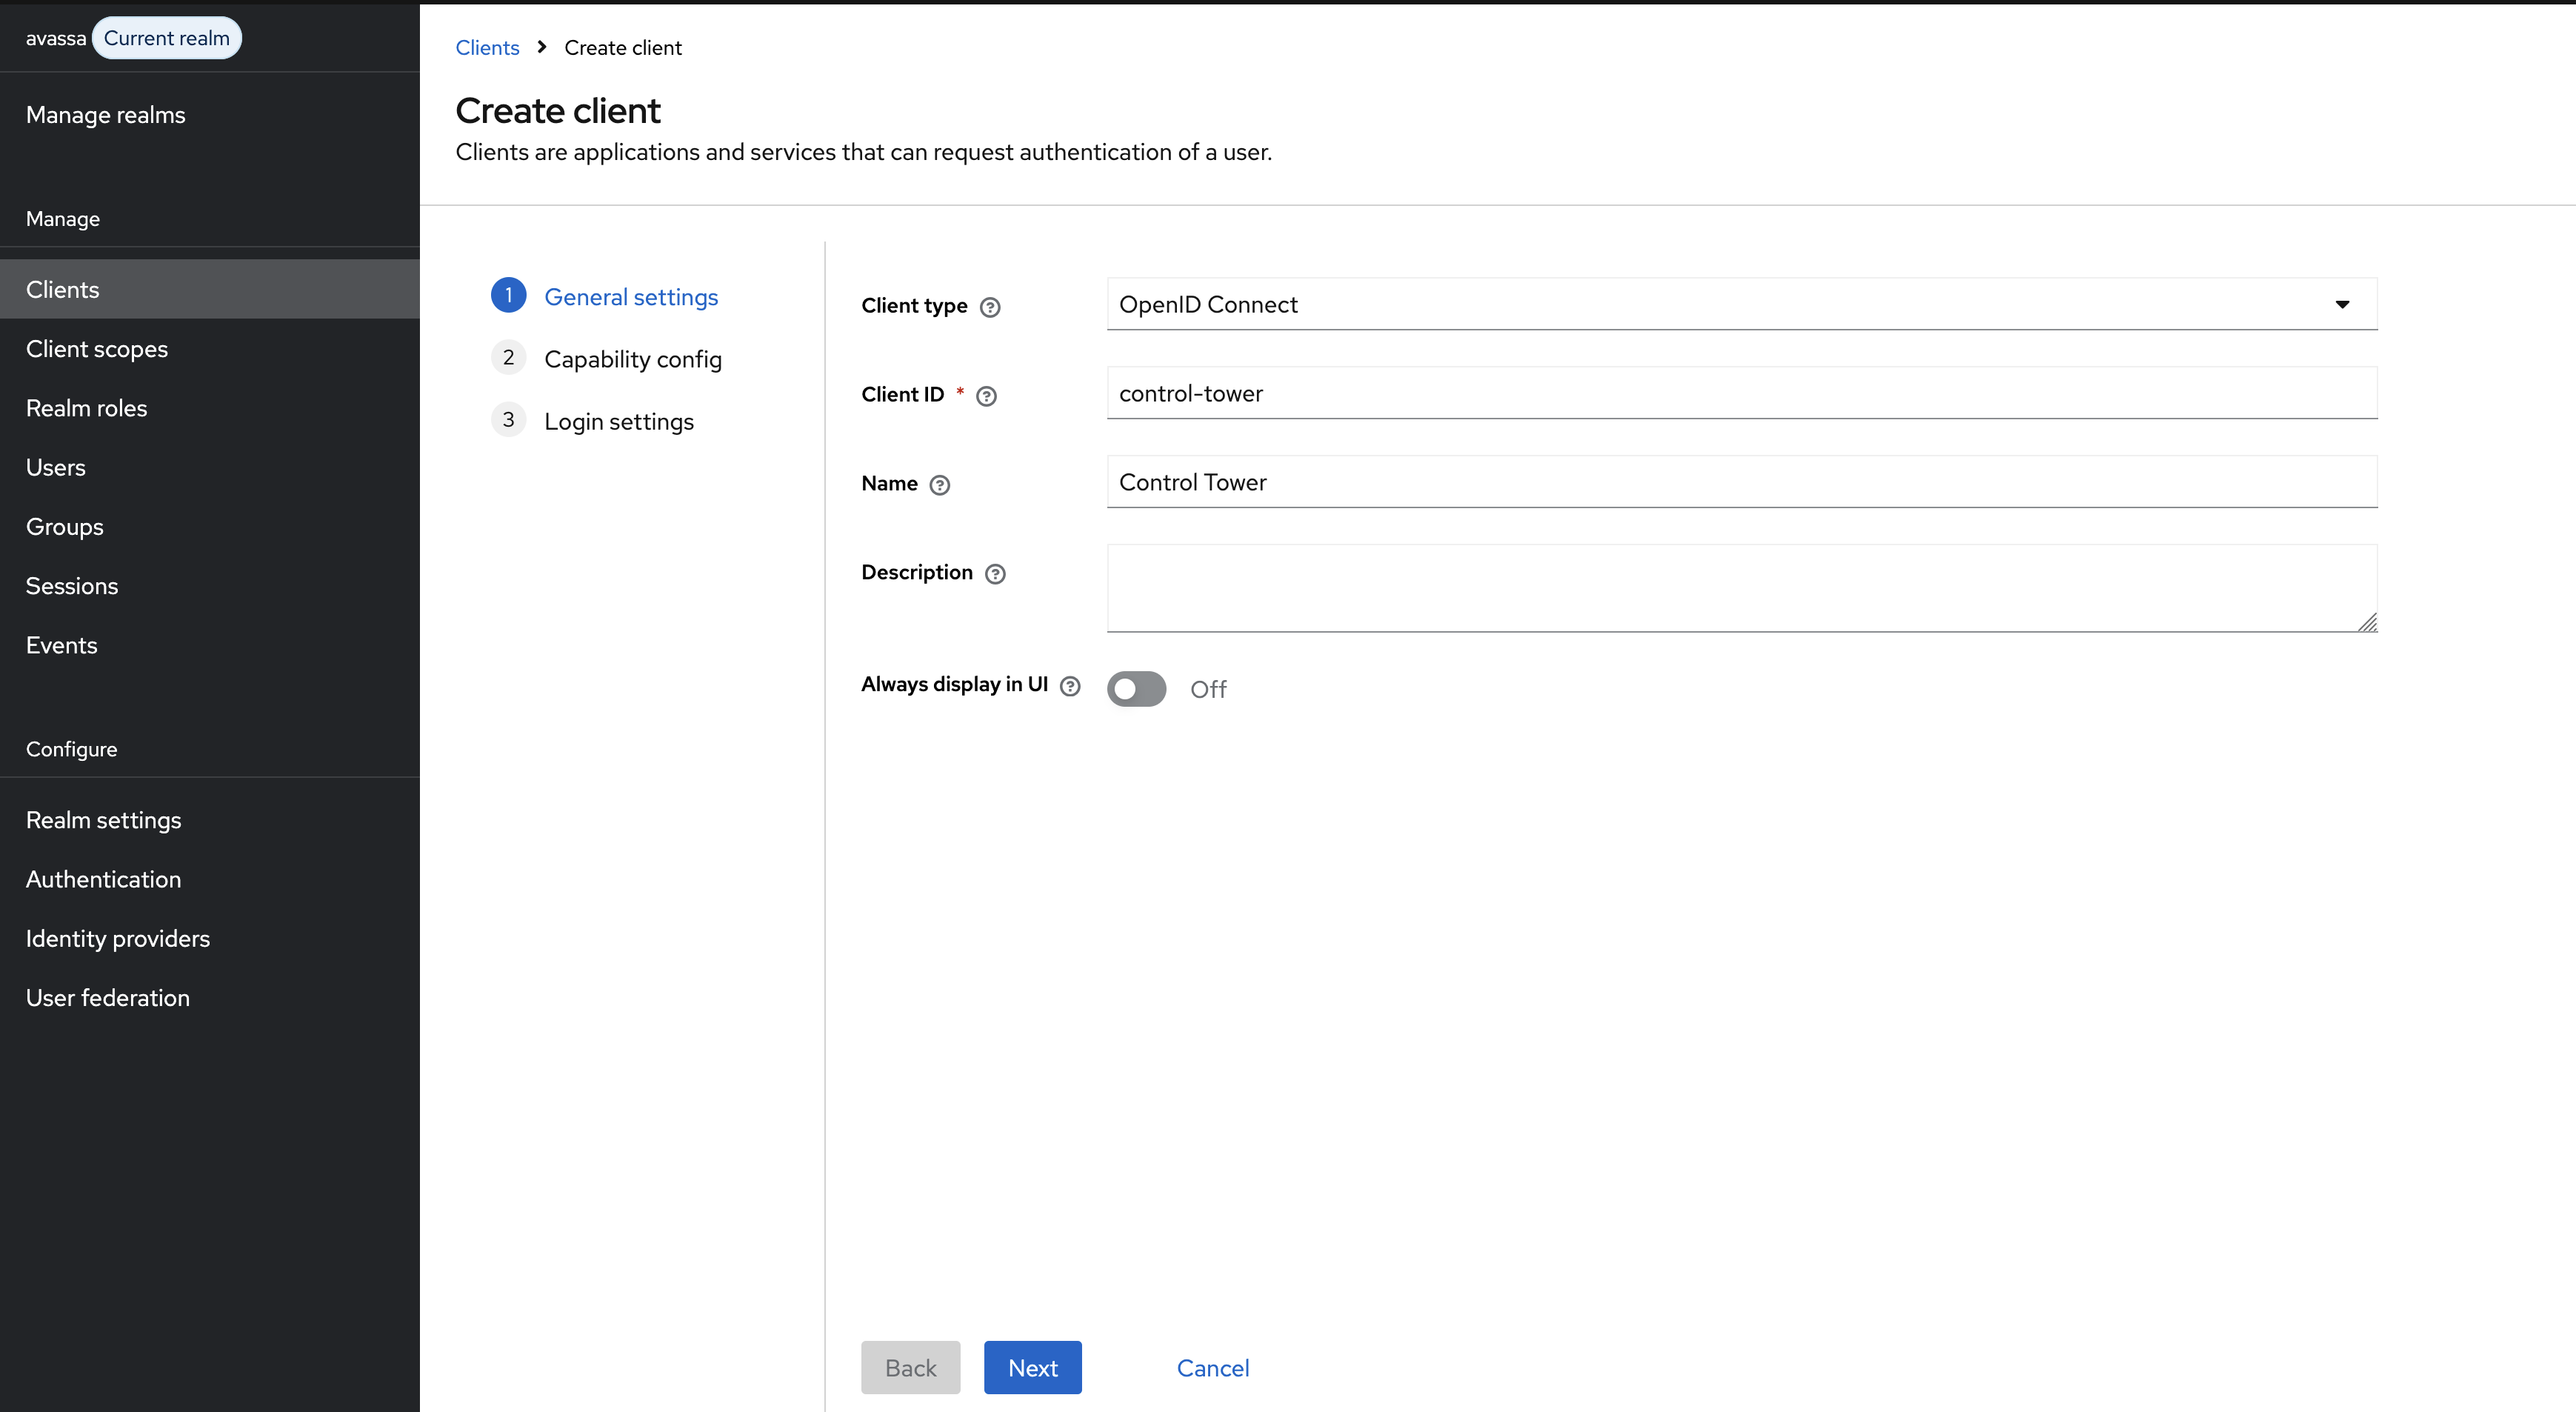
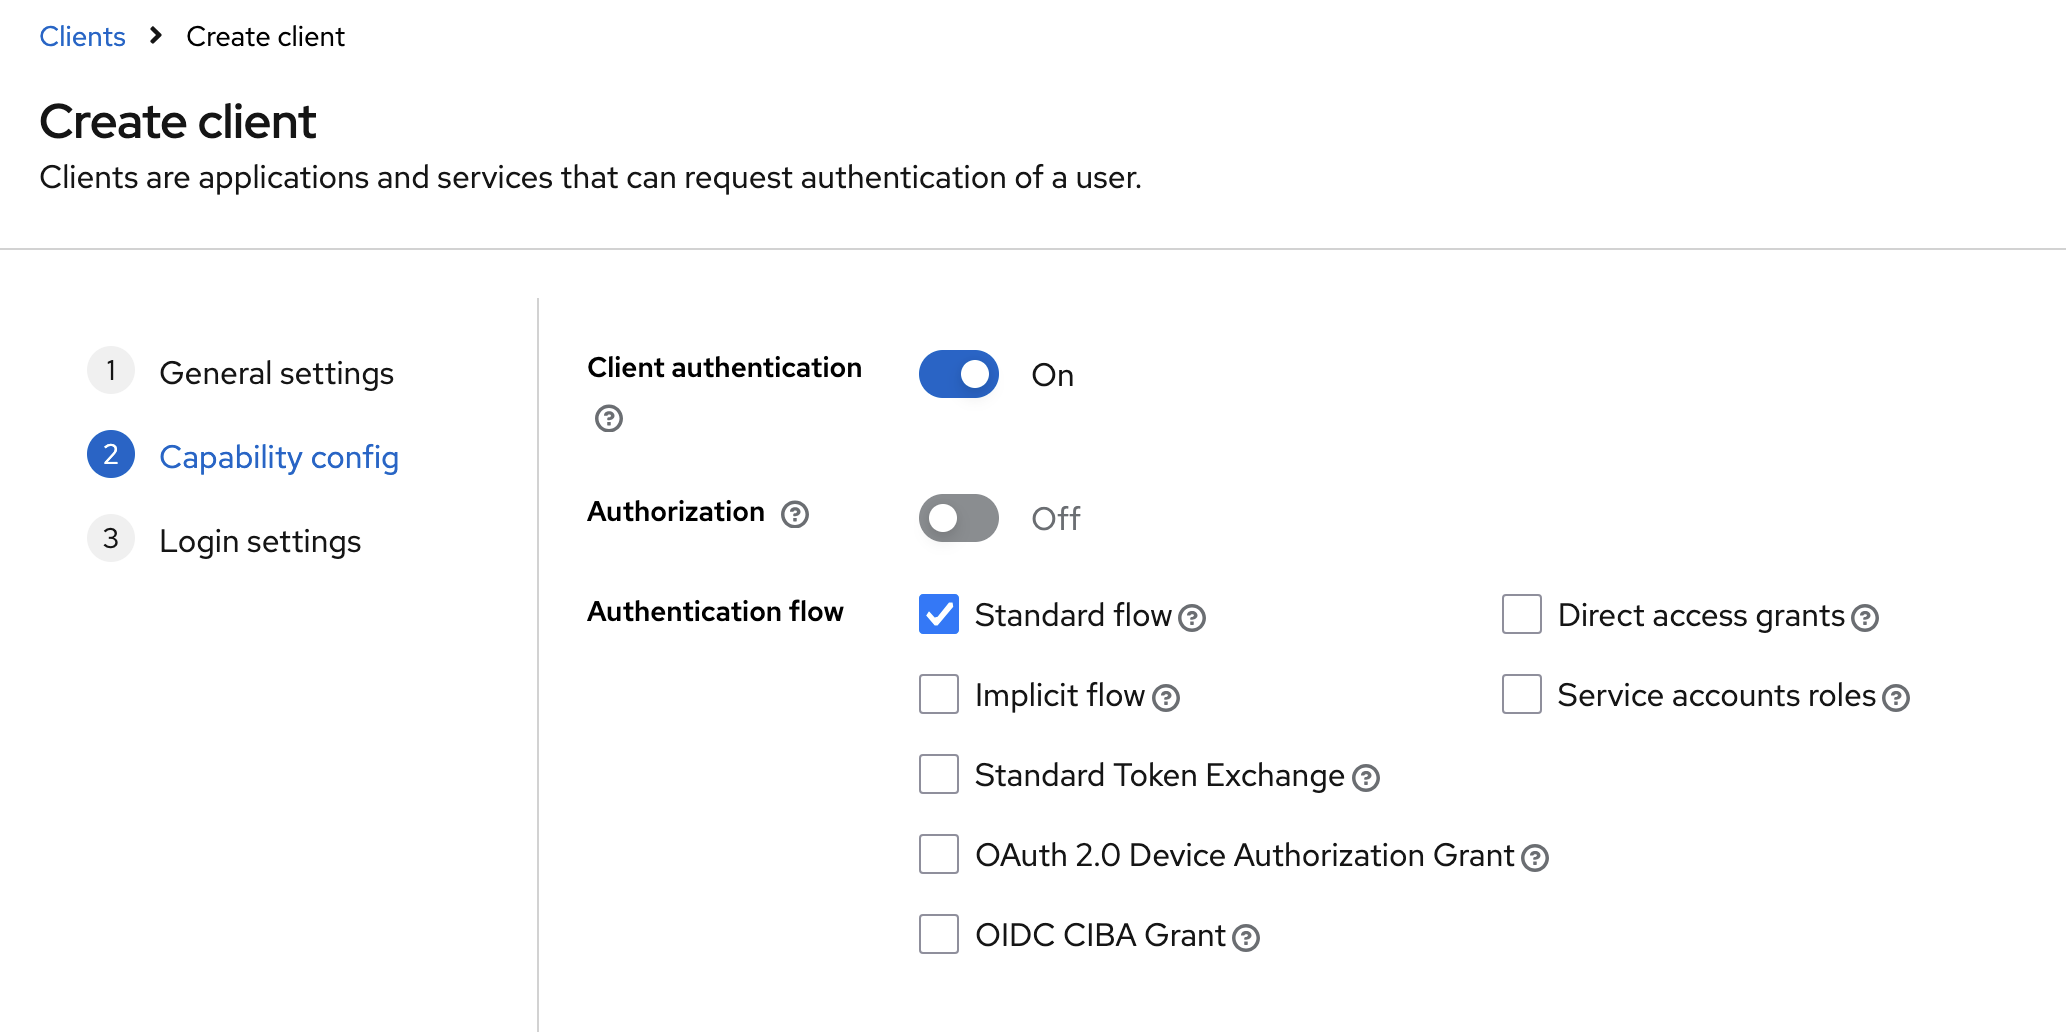
Enable Client authentication and authentication flow "Standard Flow" in the client settings.
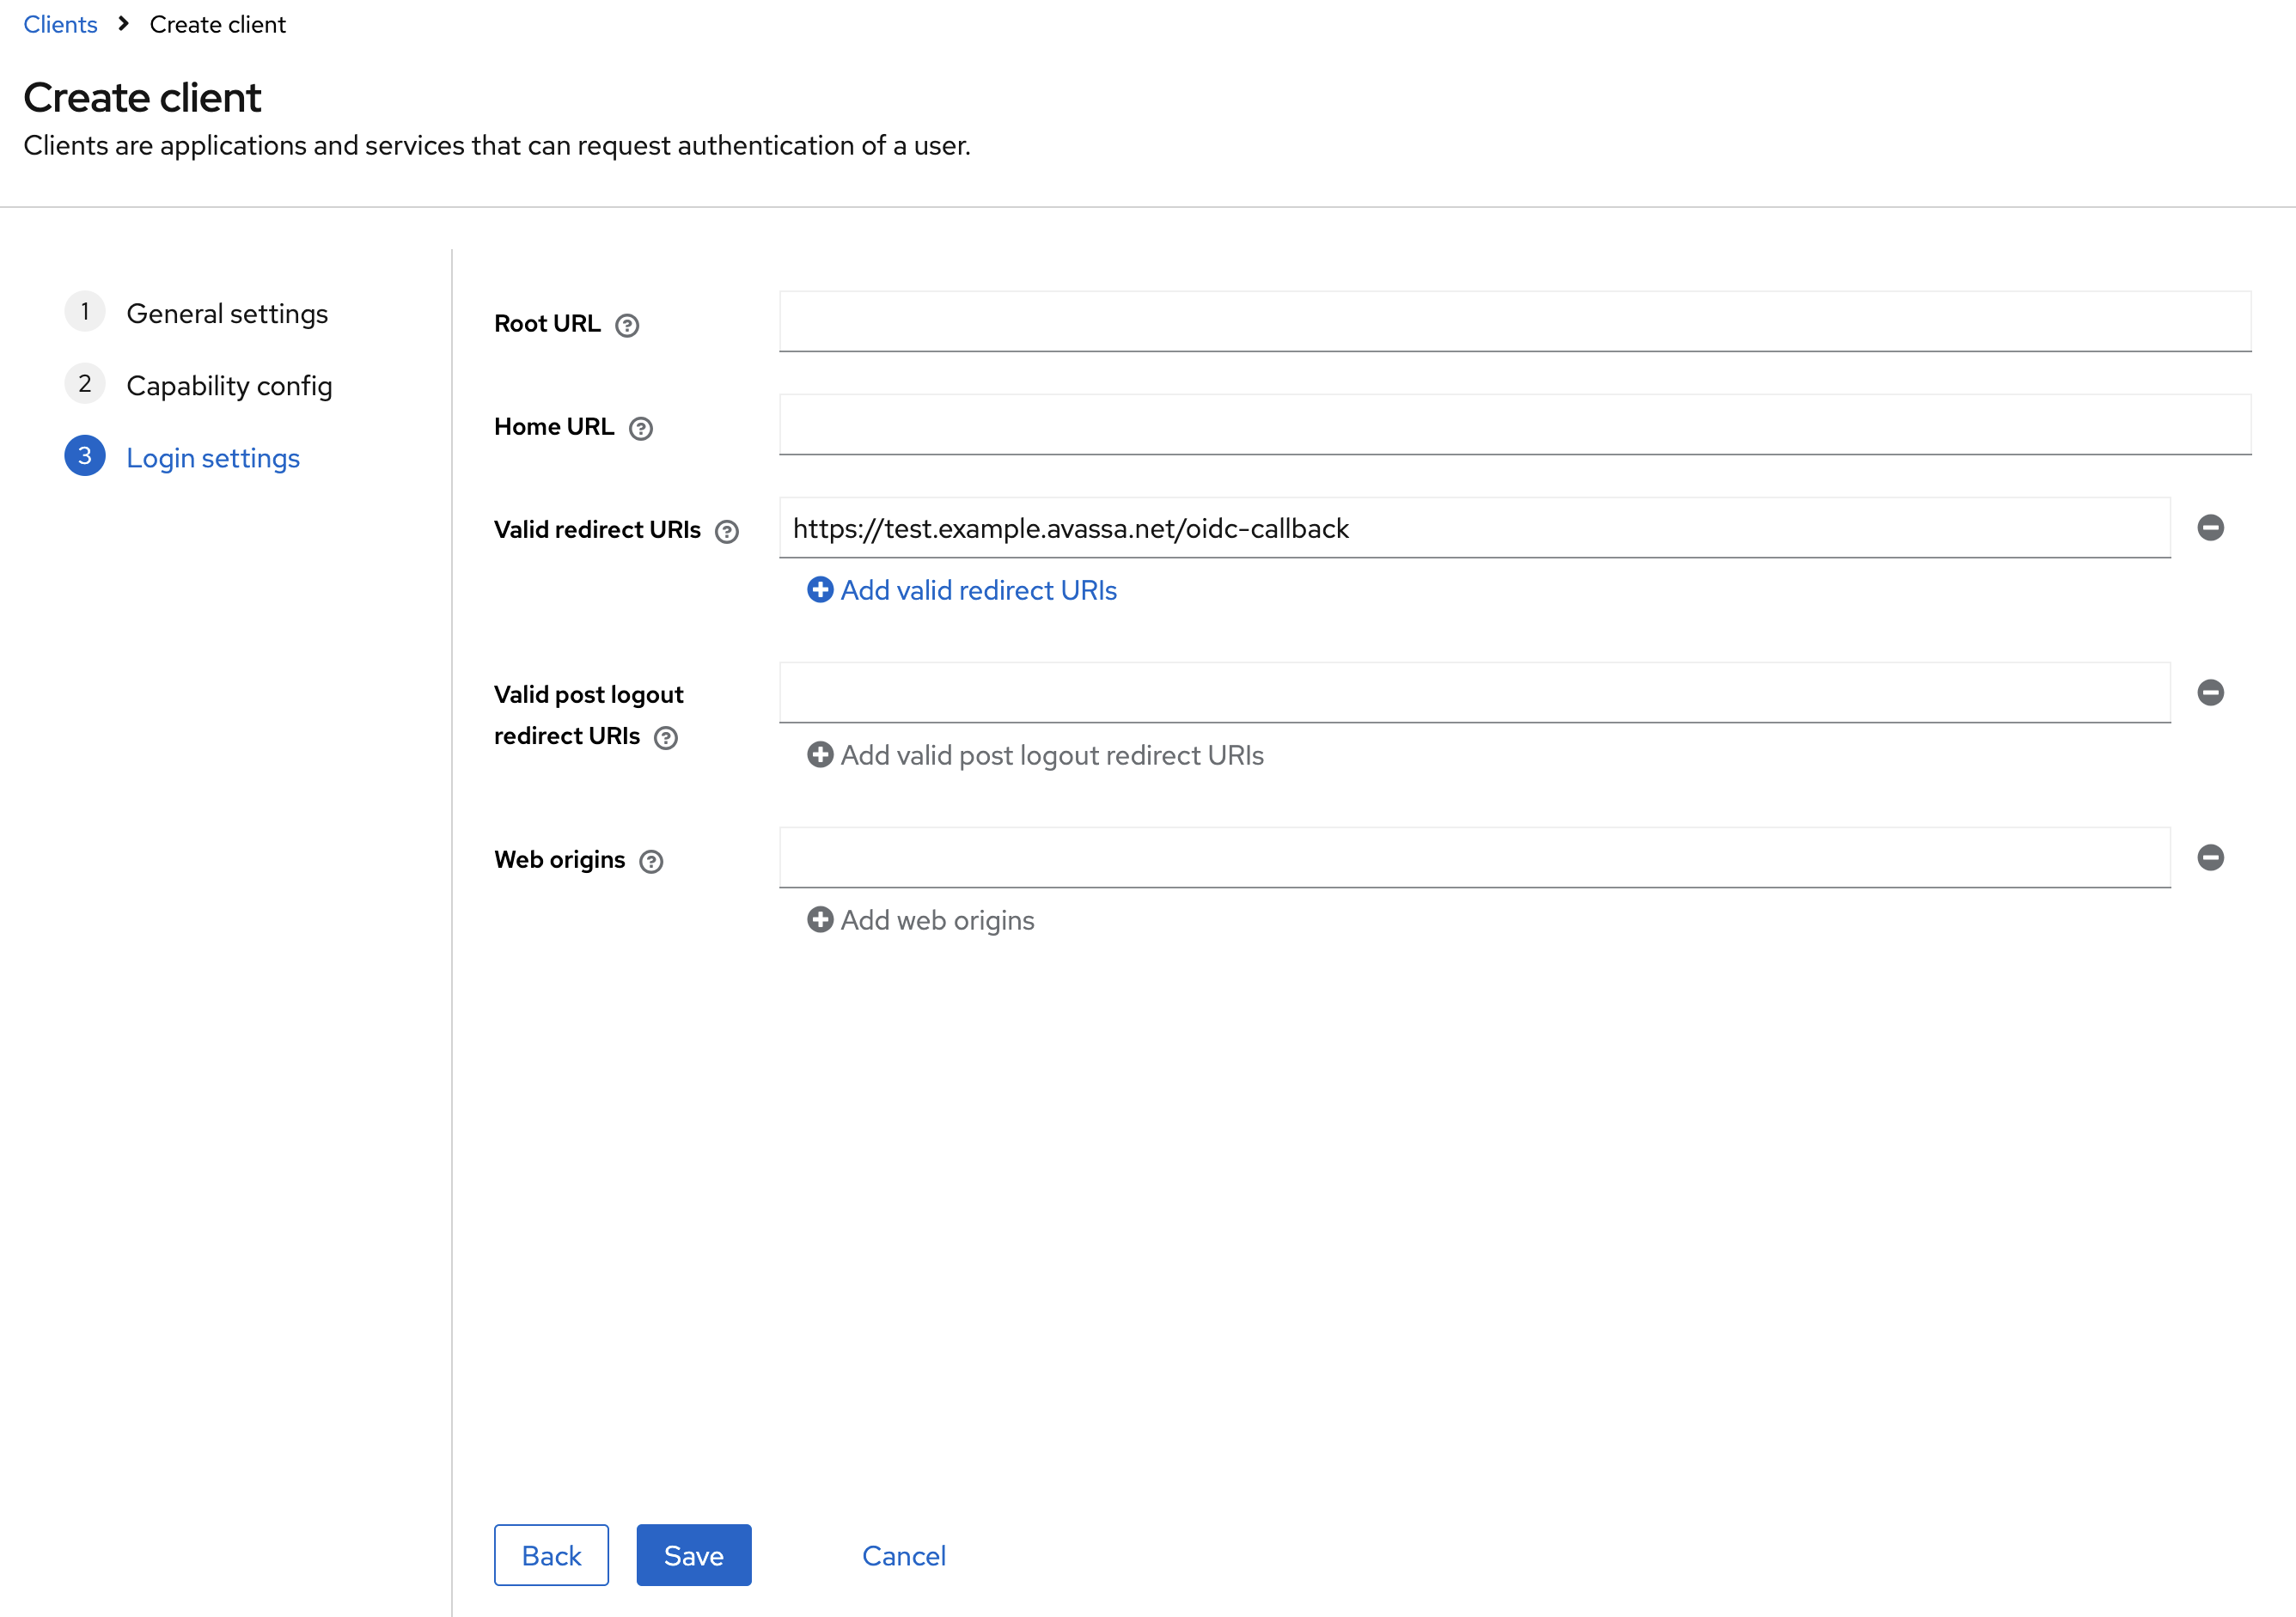
Set the Valid redirect URIs to the URL of your Avassa system, for example:
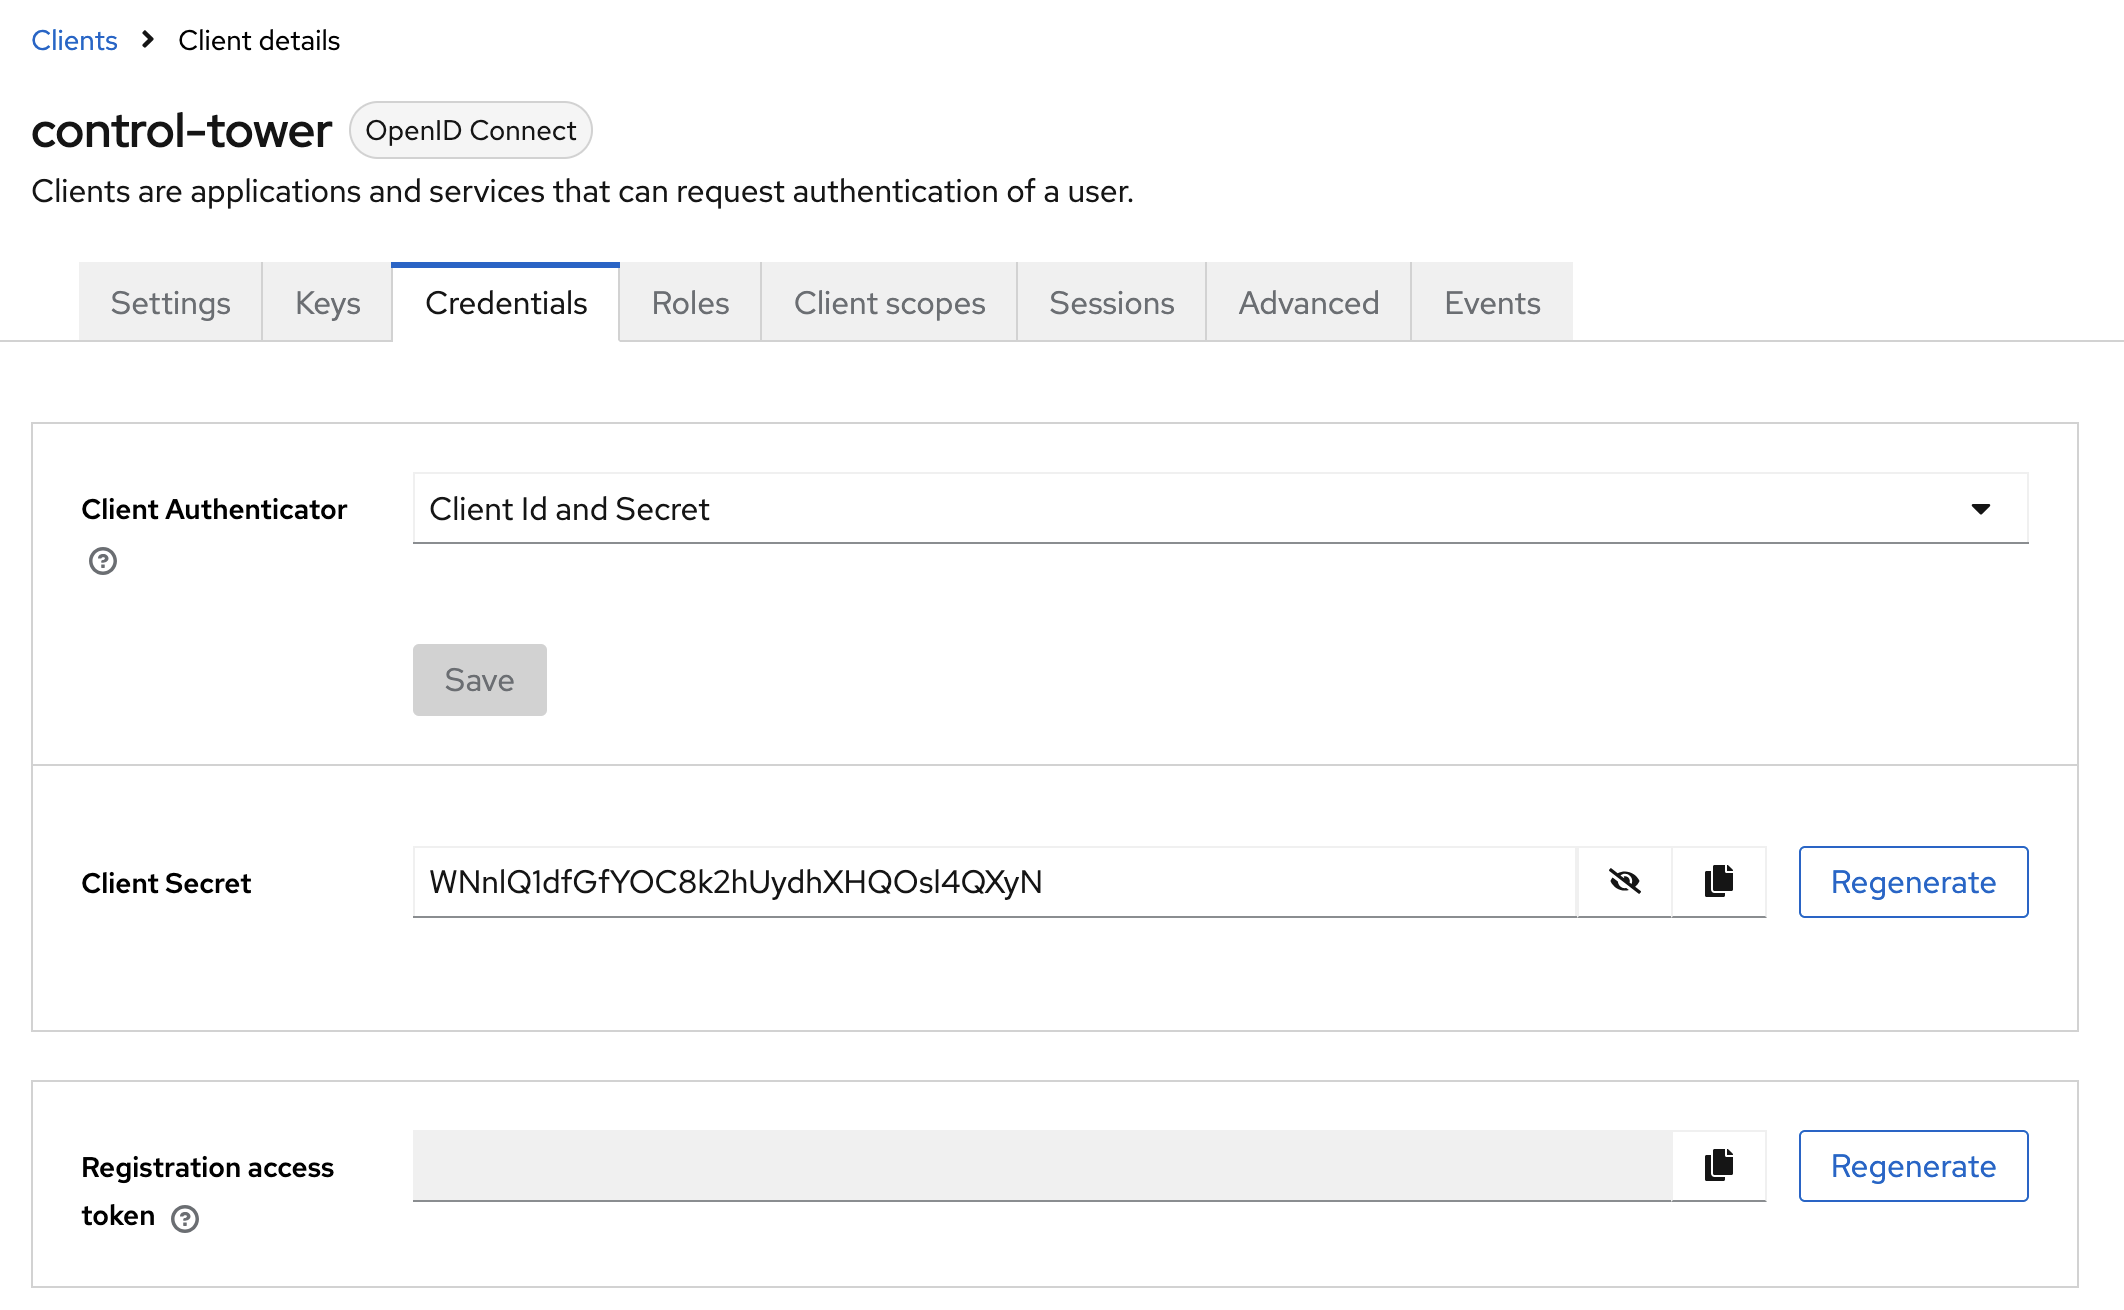
Save the client and go to the Credentials tab to get the Client Secret.
You should now have the following values from Keycloak:
- Client ID:
control-towerin the example - Client Secret:
WNnlQ1dfGfYOC8k2hUydhXHQOsl4QXyNin the example above
The Discovery URL is constructed as follows:
- Discovery URL:
https://<keycloak url>/realms/<realm name>/.well-known/openid-configuration
Configure Control Tower
Create a new OIDC service in the Control Tower using the supctl command line tool.
supctl replace strongbox authentication oidc-services keycloak <<EOF
name: keycloak
display-name: Keycloak
discovery-url: <replace me>
client-id: control-tower
client-secret: <replace me>
default-role: default
verbose-logging: true
EOF
For all possible configuration options, see the documentation.
In production make sure you set verbose-logging: false to avoid excessive logging.
Next create the default role for the OIDC service:
supctl replace strongbox authentication oidc-services keycloak roles default <<EOF
name: default
# If the email claim is not available, deny access to the system.
required-claims:
  - email
claim-mappings:
  name: fullname
  email: username
# Map the roles from Keycloak to the policies in the Avassa system.
# Note, if you change the client ID in the previous step, you need to change the
#  "control-tower" here as well.
policies-claim: resource_access.control-tower.roles
allowed-redirect-uris:
  # Replace me
  - https://test.example.avassa.net/oidc-callback
verbose-logging: true
EOF
For all possible configuration options, see the documentation.
In production make sure you set verbose-logging: false to avoid excessive logging.
The above mapping will map the email claim to the username in the Avassa system. This is important
as it will ensure the email address is logged in the audit trail logs and rendered in the UI.
The name to fullname mapping is optional, but recommended.
Configure Roles in Keycloak
Next, we will create roles in Keycloak that match the policies in the Avassa system.
Typically a tenant has at least two roles: root and user. The root role
has full access to the tenant, while the user role has limited access.
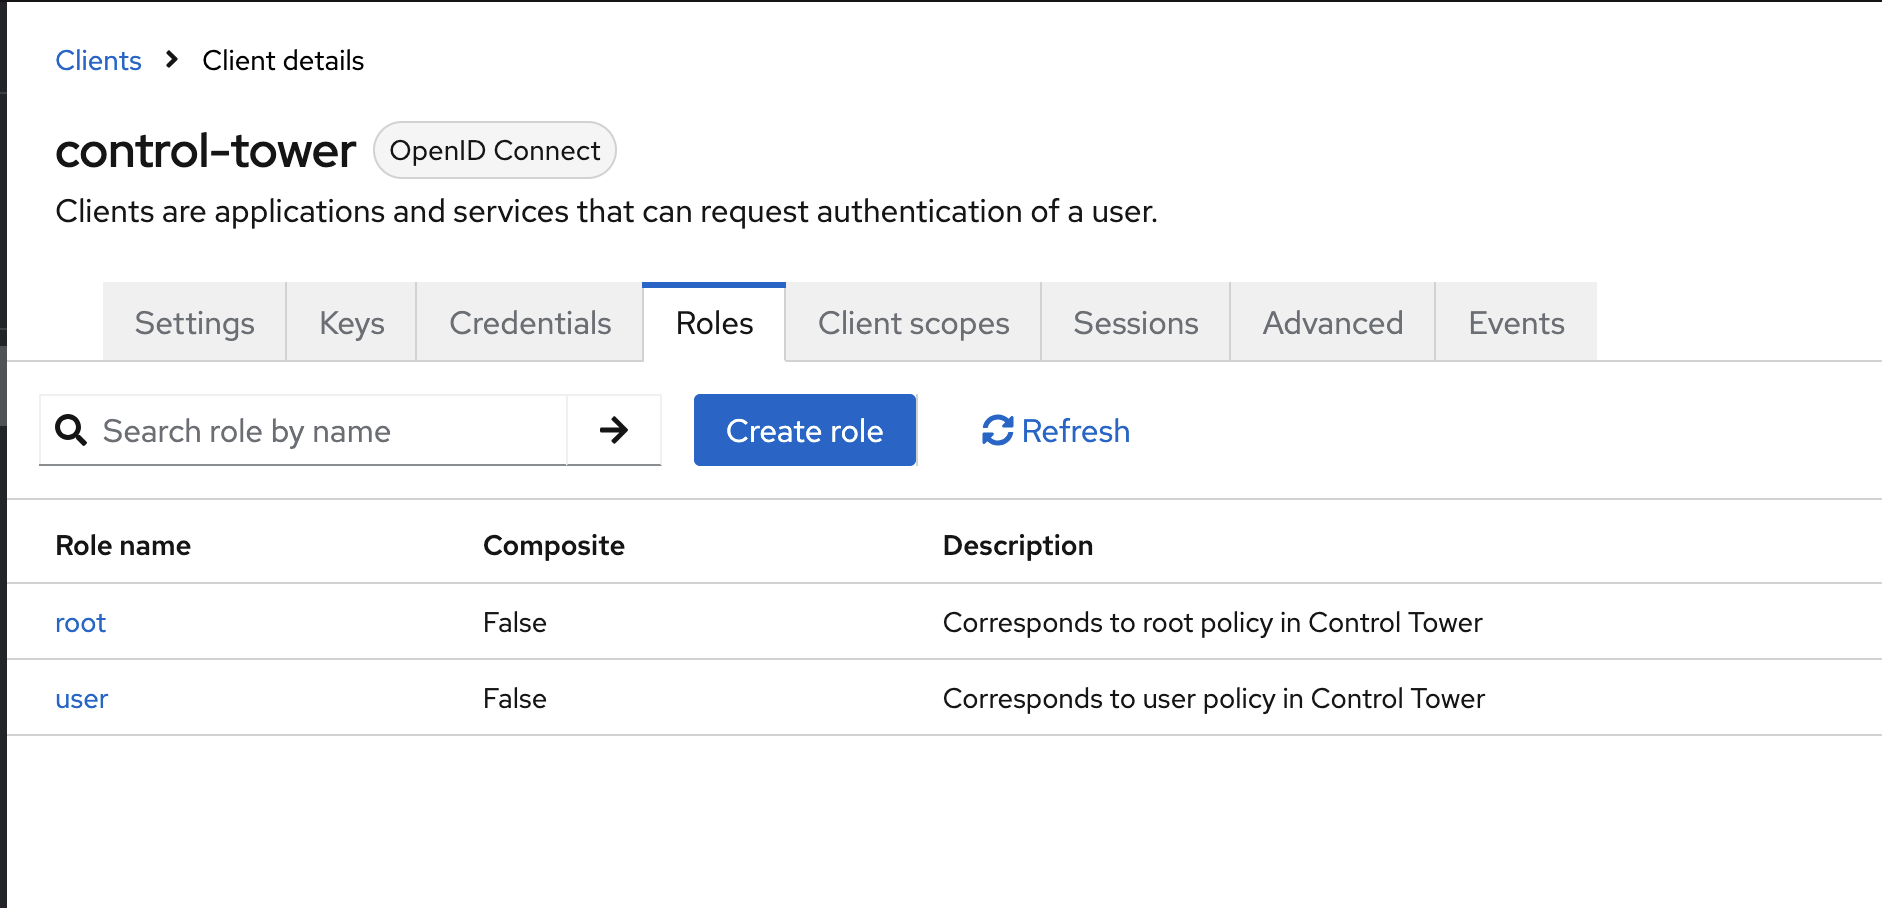
To create the roles, go to the Roles tab in the Keycloak client and click on Create role and
create the roles.
Make sure you create the roles in the correct client, not in the realm.
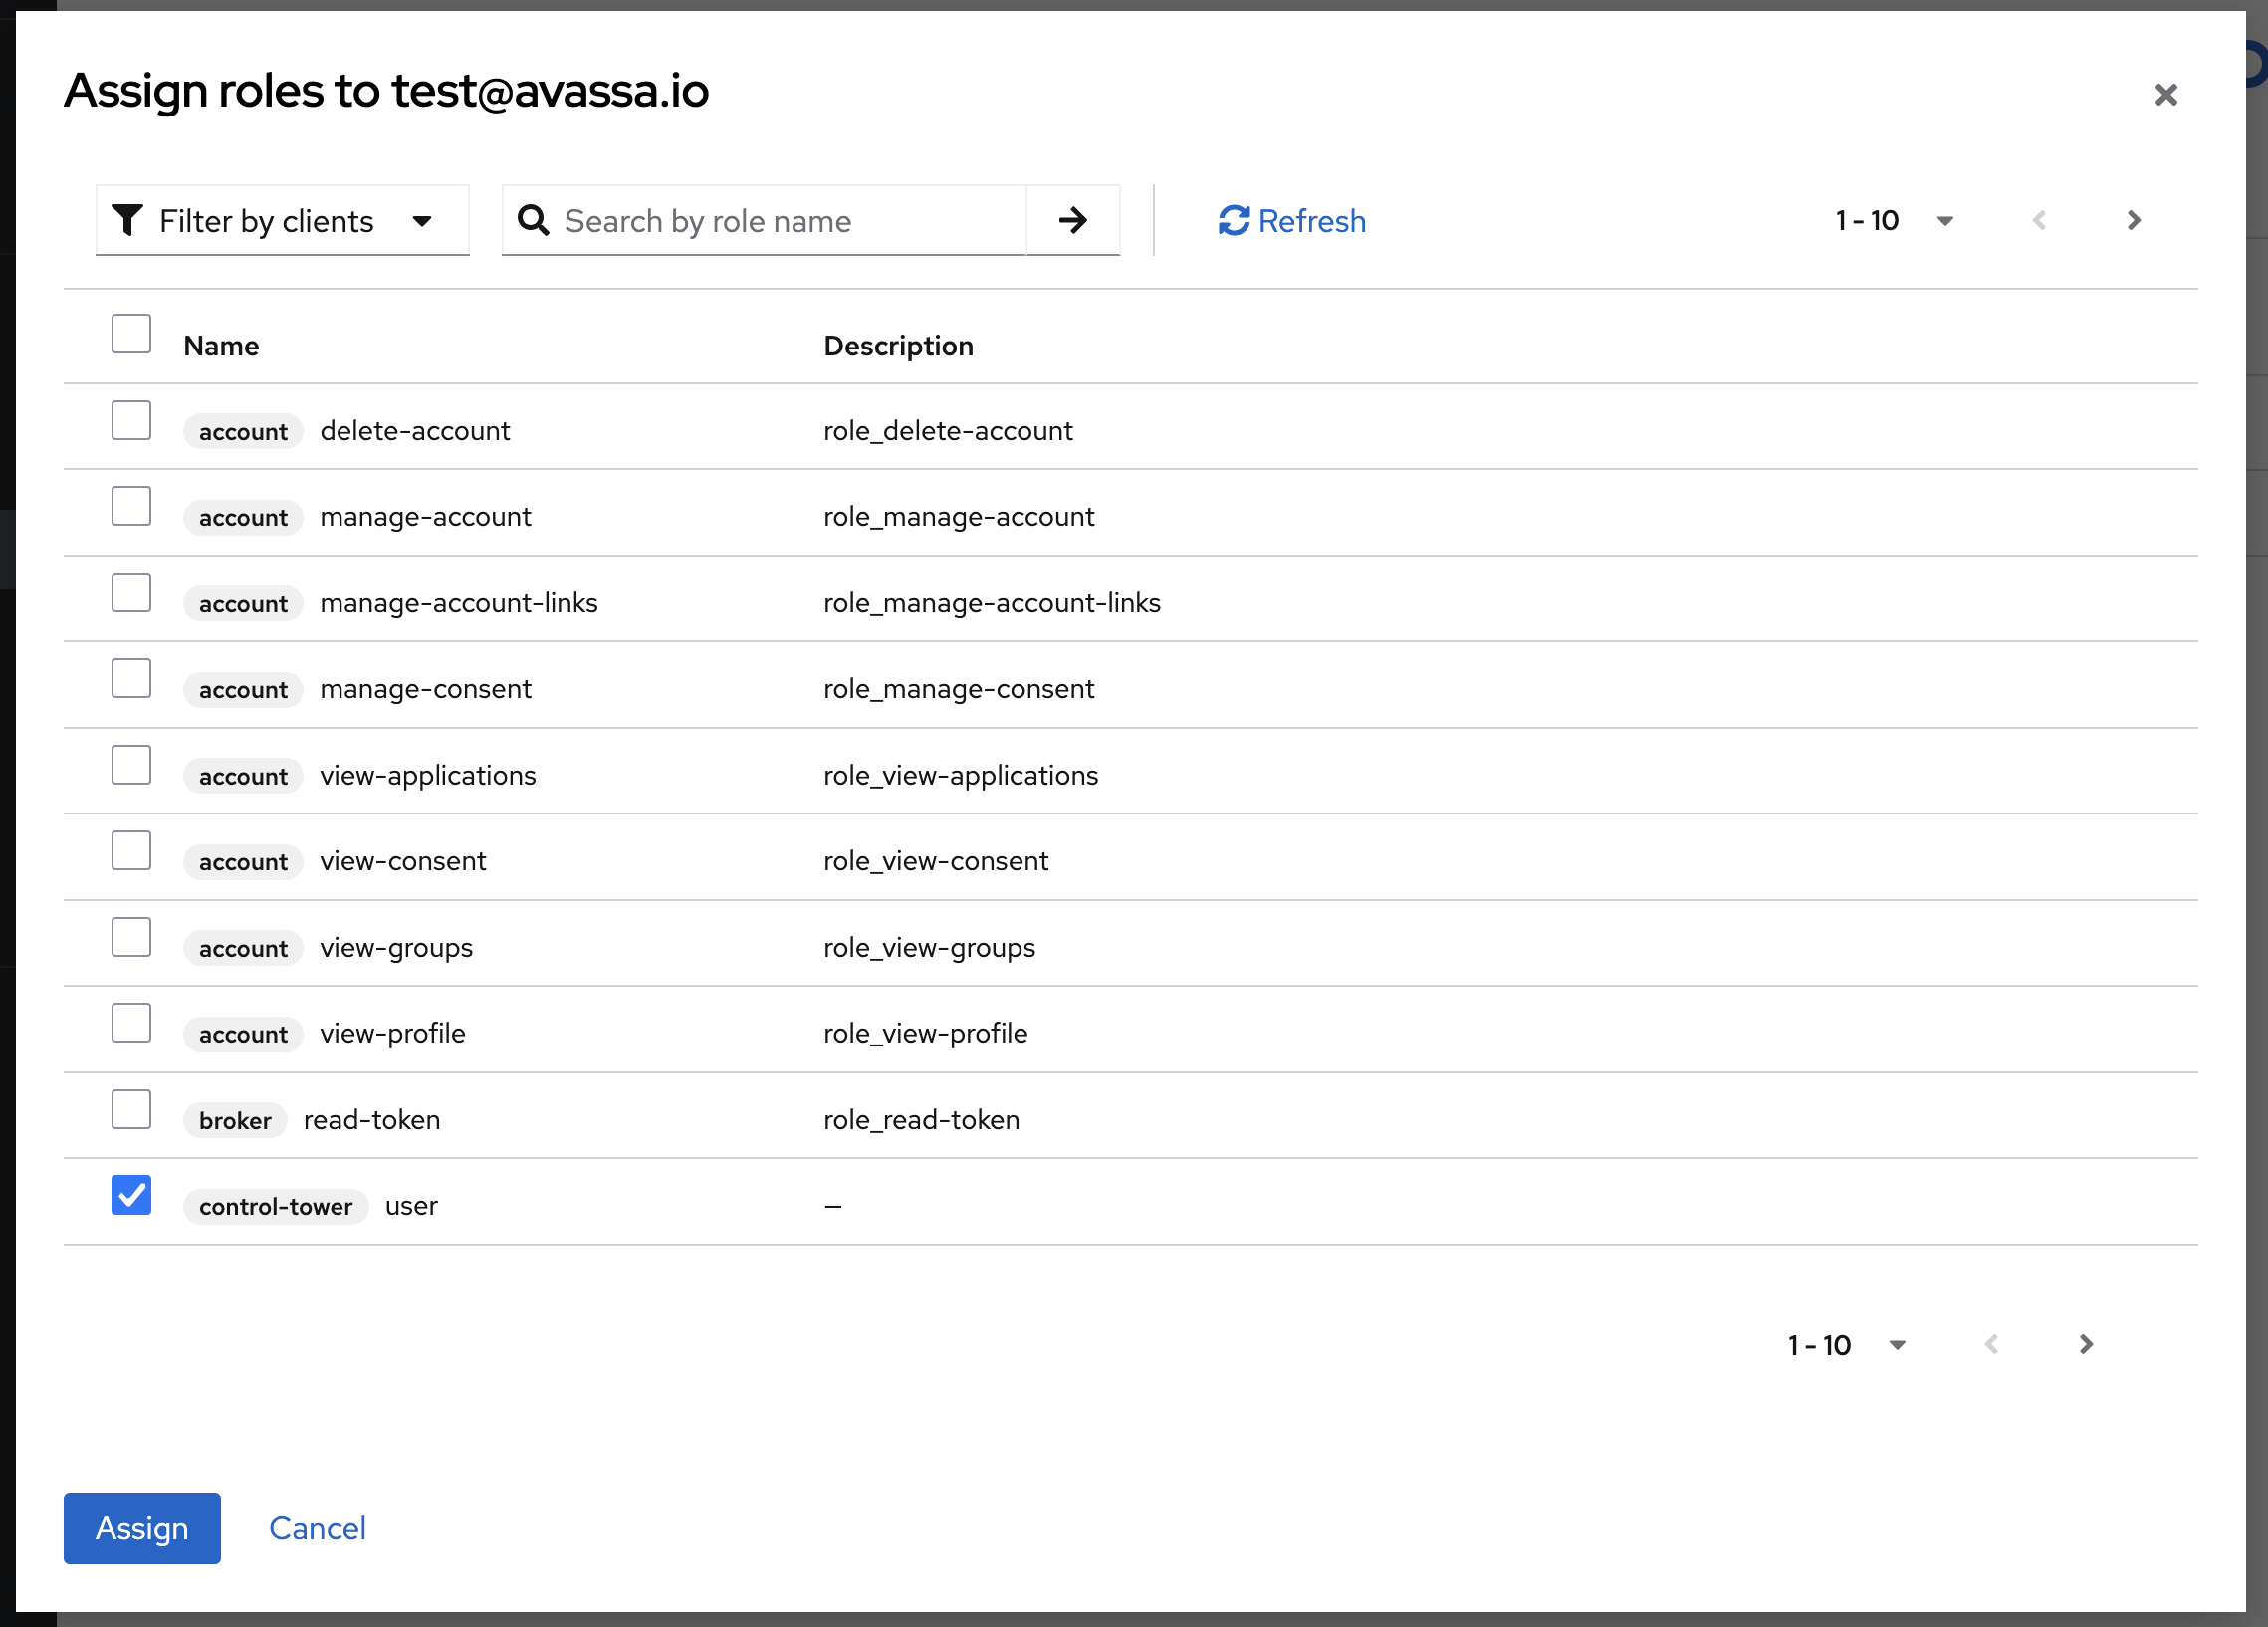
Finally you can assign the roles to users in Keycloak by going to the Users tab, selecting a user and
then going to the Role Mappings tab.
Troubleshooting
In case login fails, you can find useful information in the following topics:
system:logssystem:audit-trail-log
supctl -t 6c1fa04e-463a-4e61-bcc9-fd1e072f16cc do volga topics system:logs consume --payload-only